
Before You Start
- Register as a merchant on Swipez
- Prepare an image which represents your event.
Here are some tips and tricks to prepare a good event image:
- If it is an art event, then list the artists who are performing or conducting the event on the banner image. Event images featuring popular artists increase the chances of people viewing your event.
- Feature your main attraction preferably using appealing images rather than just text.
- Include your company logo.
- Include your sponsors logos if applicable.
- Test your image against the Facebook Text Overlay tool
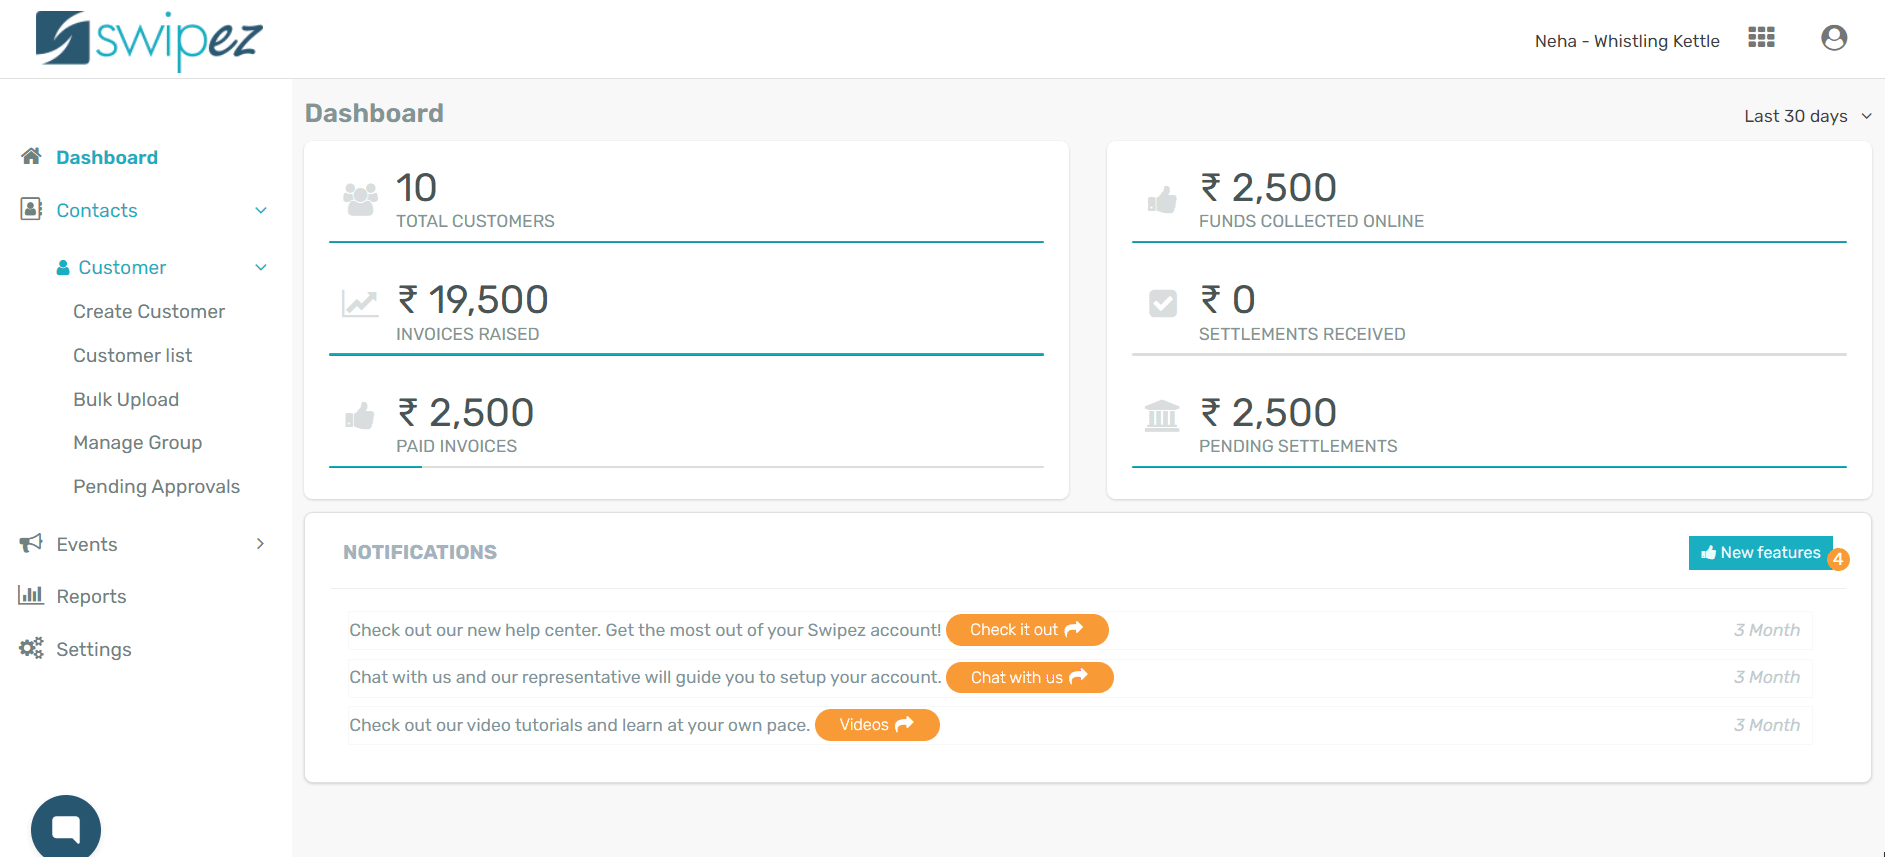
The Swipez Event registration software provides a comprehensive events management solution to power your events.
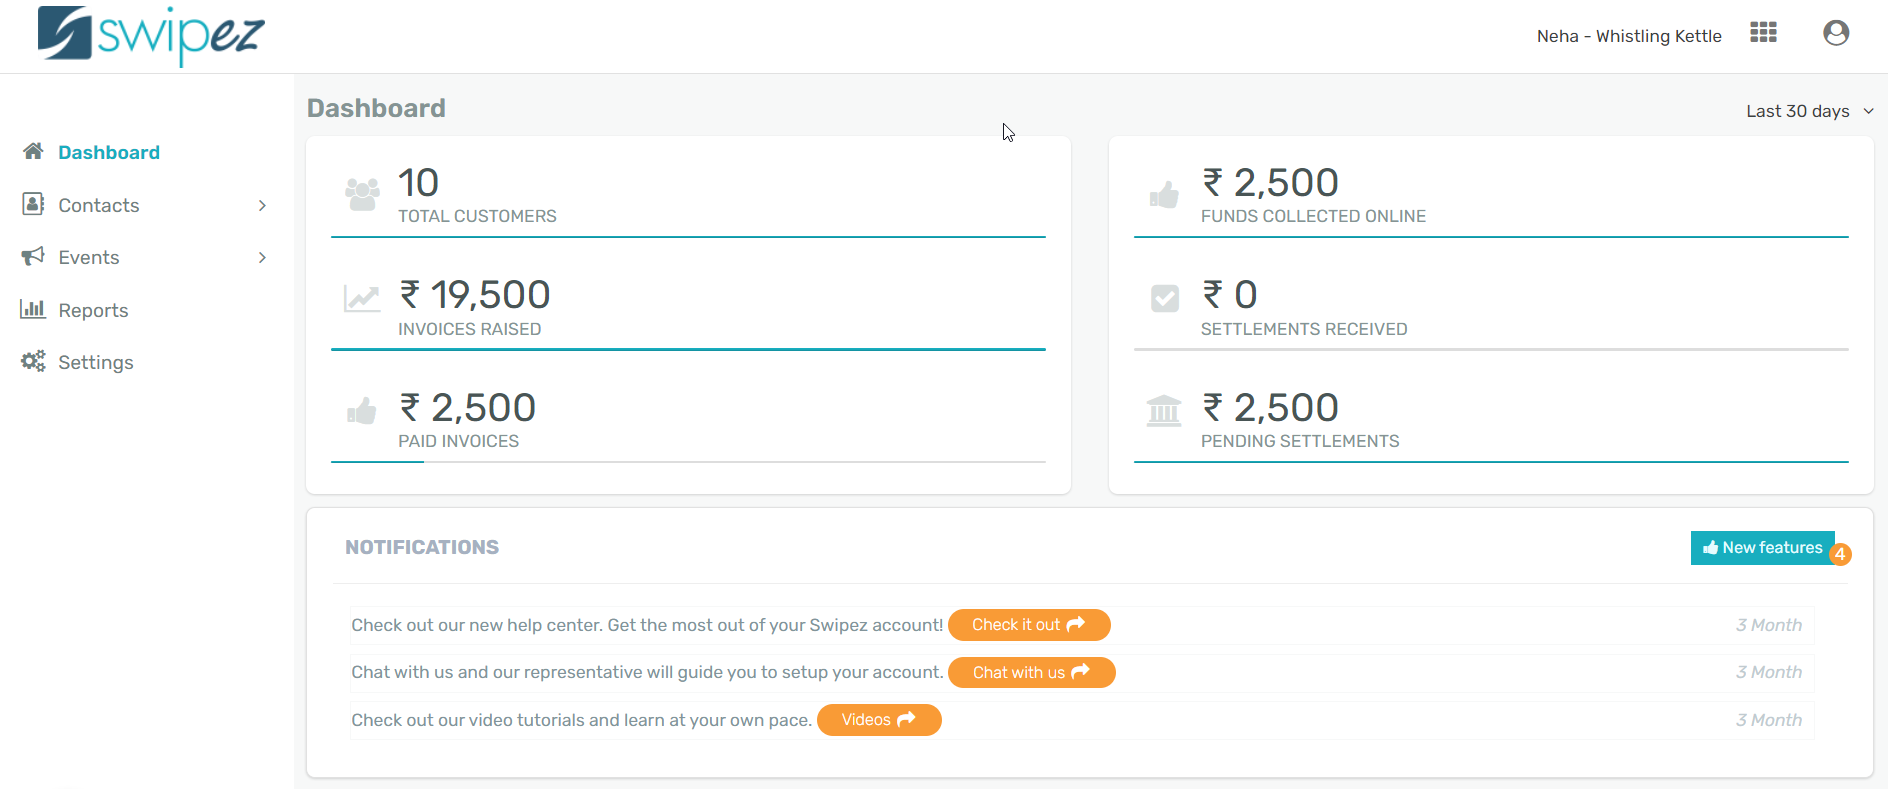
From the event registration software dashboard you can manage your contact information, events, registrations, reports, and settings.
Manage customer contacts
As an event planner, you'll need to keep track of and reuse data from previous and current events' attendance. You can find these details under the Contacts tab.
Manage customer contact information
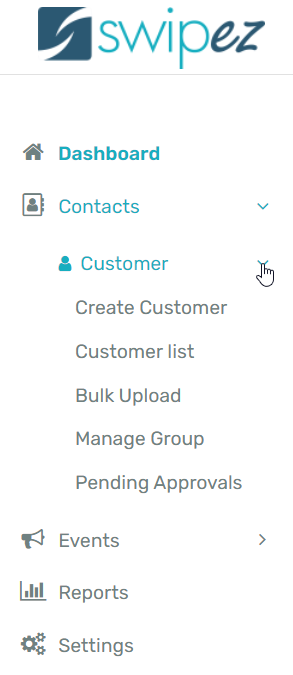
From Contacts -> Customer tab you can start managing your entire customer database. Click on the Customer tab to reveal all the options present to manage your customer database.
From the Customer tab you can control all aspects of your customer database:
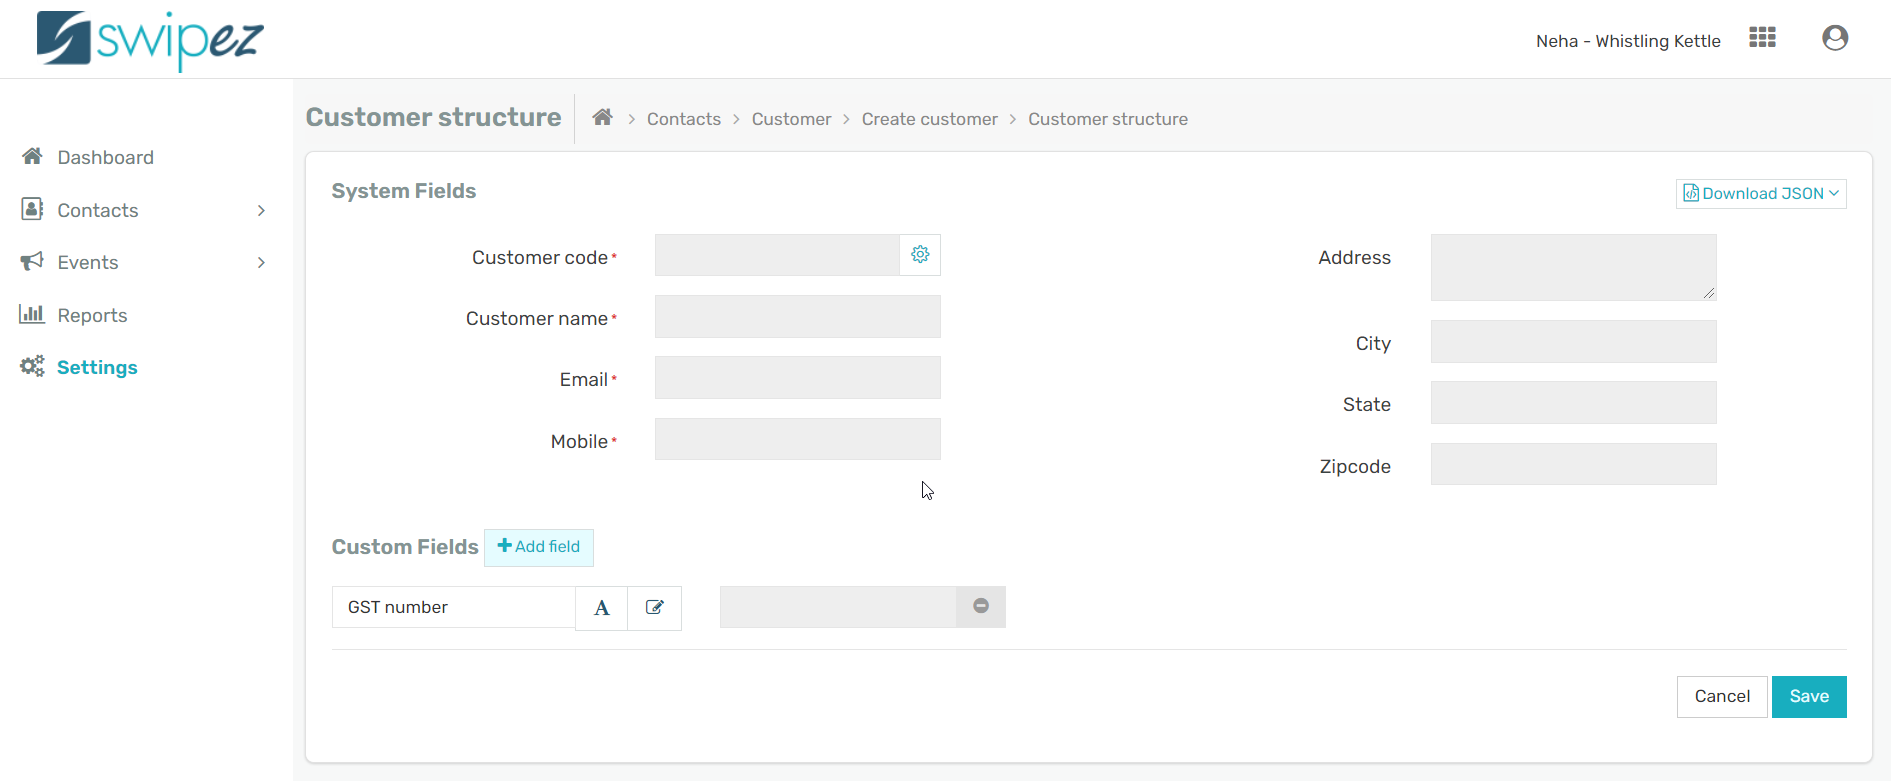
Create a customer database with the fields and data types you need.
The System Fields section includes fields for you to capture essential information like the customer code, customer name, contact details.
- Customer code — This is a one-of-a-kind, fully customizable code that aids in customer identification and distinguishes clients that have identical fields. It helps you to uniquely identify every customer in your database.
There are 2 options you can avail to set your unique customer code:
- The code can be auto-generated. Swipez will add each customer code with the prefix you choose in increasing order as you continue to add new customers.
- If you already have a unique identifier that you use to identify your customers then you can continue using the same value. You only need to make sure that the identifier is distinct from the rest of your customers.
- Customer name— You can enter the customer's name, though note that special characters such as &,@, %, and * are not allowed.
- Email & Mobile number— These fields lets you include contact information for the customer, such as their email address and phone number.
- Address— You can add the customer's address information, including the city, state, and zip code.
Setup the structure and fields of your customer database as per your events requirement.
Add the fields required by you to store complete customer information during bookings. You can also set up custom fields that can be used to collect specific information of attendees and payees. Simply click on the +Add field button next to Custom Fields to add new fields as per your requirements.
To know more about the different types of custom fields, read...
Create a new customer record by entering the information into the easy to use form as per your pre-defined structure.
The curated customer data can be used when you want to make offline bookings for the customer. And, to upload customer information of patrons from earlier events that you would like to market the forthcoming events to.
Customer List — View the list of the customers added in your customer database. Each time a patron makes a booking for your event their data is added to your customer database on Swipez.
A complete record of all your customers is maintained here from prior and ongoing events. You can export the customer data into an excel sheet or search for customer information as per your requirements.
Click on the Actions ⋮ button on the right hand side to view, edit, or delete customer records.
Bulk Upload — Import your existing customer data and add multiple customers in your database in one go by uploading an excel of your customer data. Click on the Download format on the Bulk upload customers page to download an excel sheet.
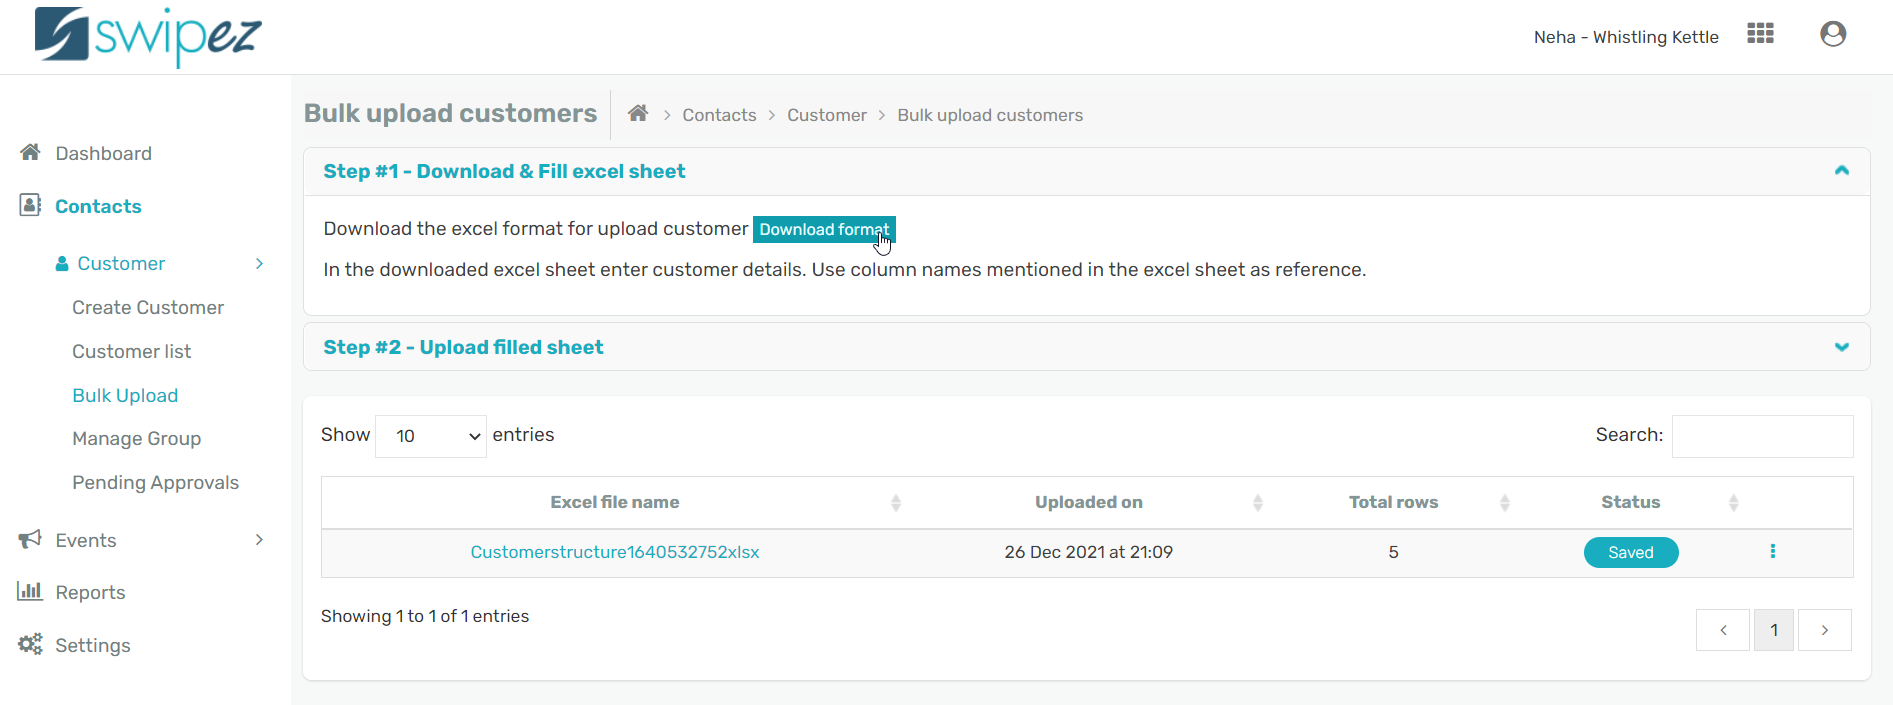
The downloaded excel sheet will contain the different columns to capture your customer information. The columns will reflect your customer structure and the various fields of customer information that you need.
If you have added custom fields to your customer data structure, those columns will be present in the downloaded excel sheet. Add your customer data into the columns of the downloaded excel sheet and save your changes.
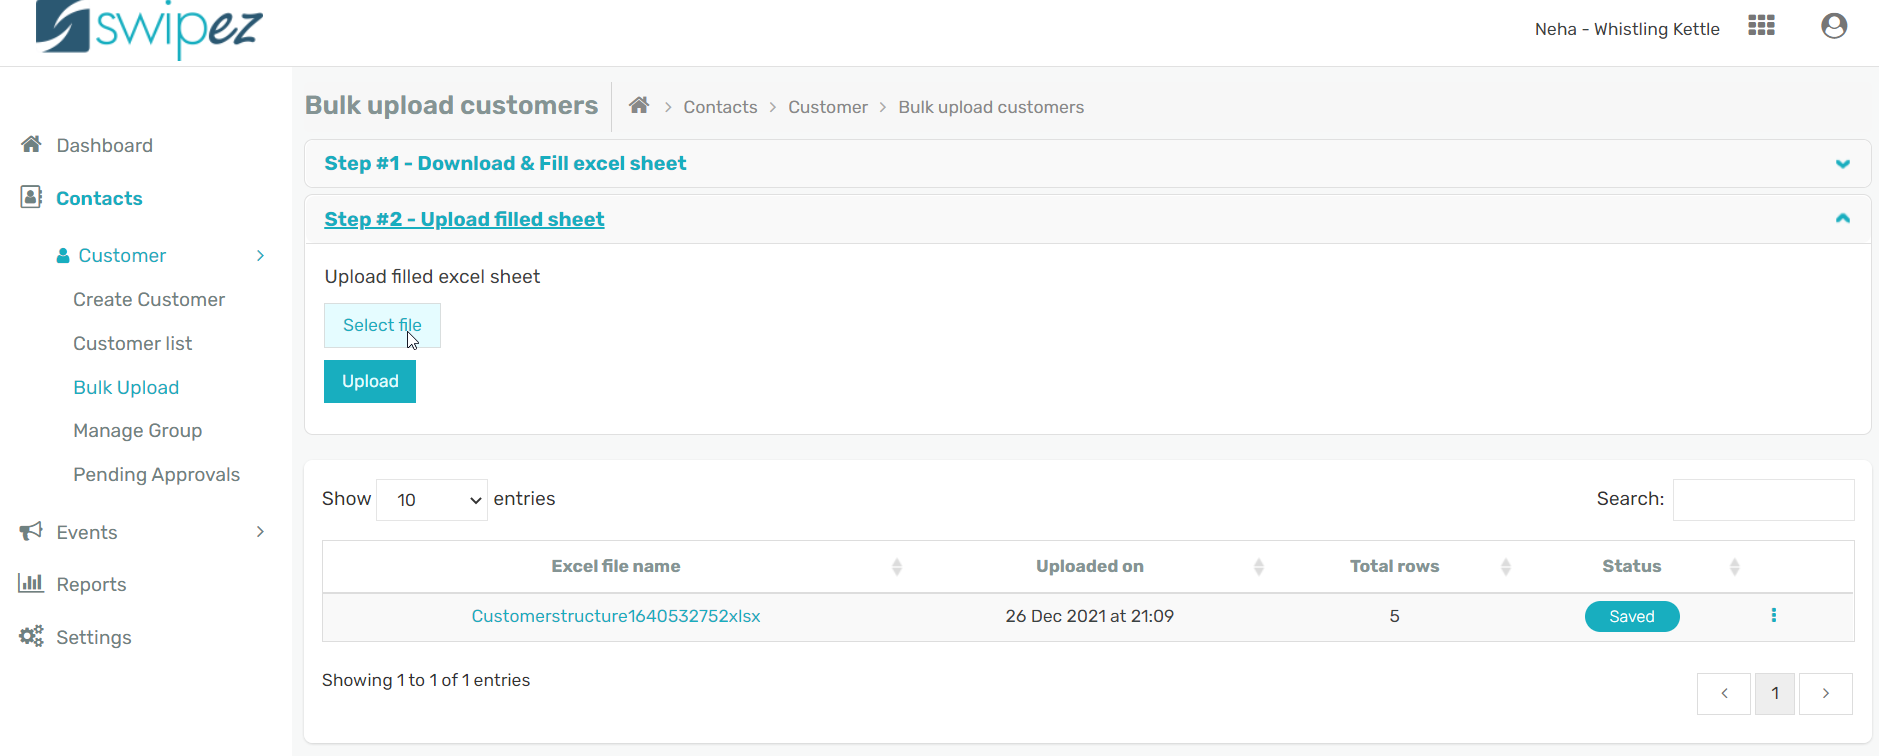
Select file to choose the sheet with the filled data that you want to upload, and click Upload.
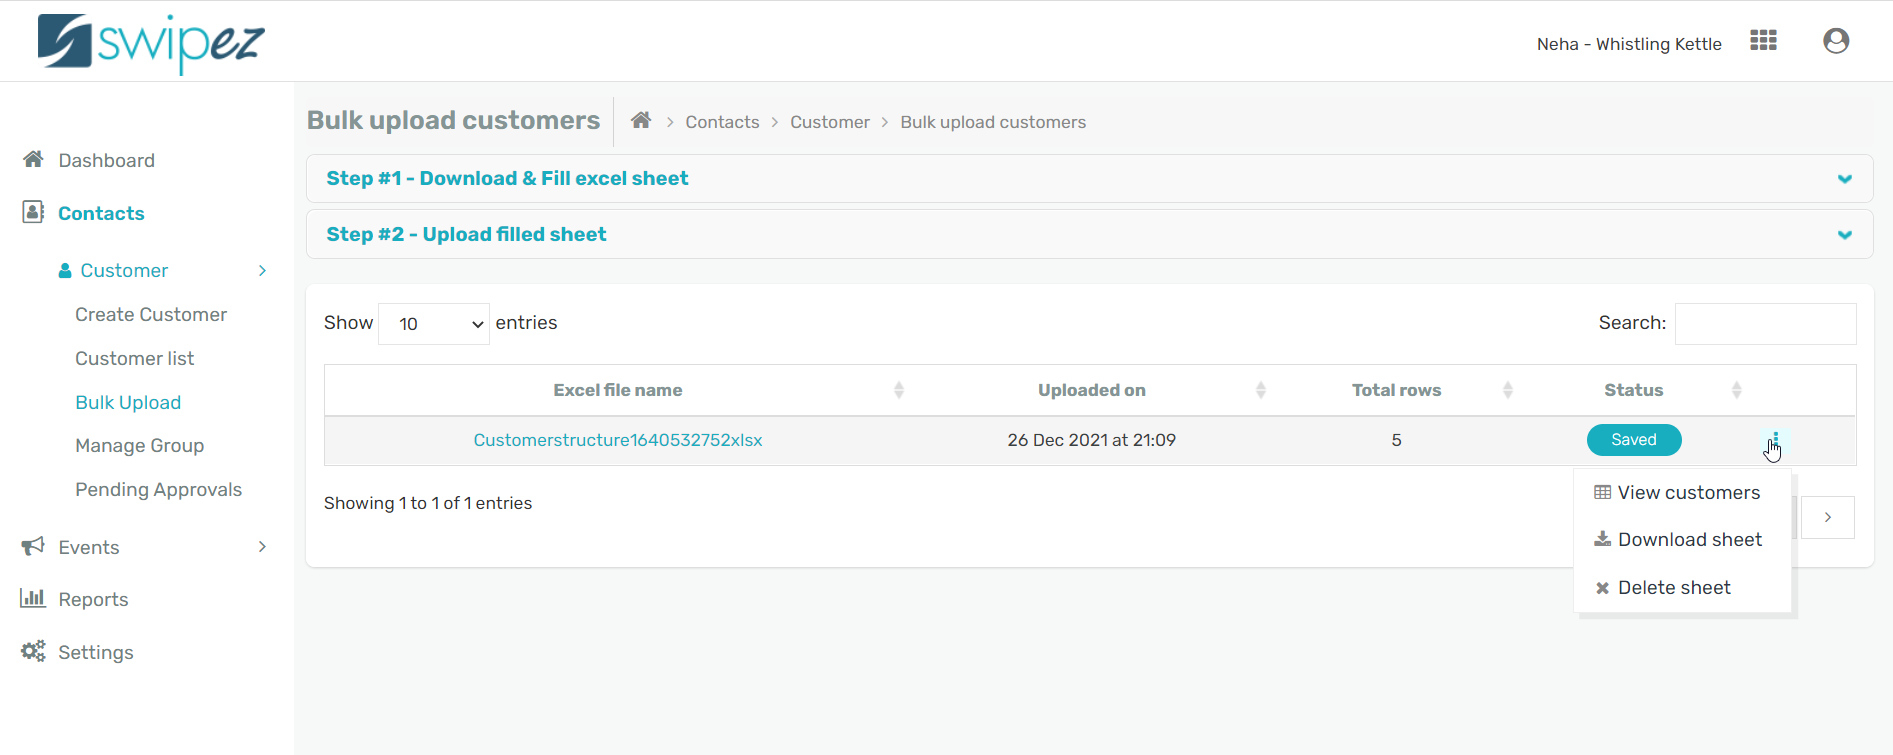
Click on the Actions ⋮ button to make changes to the uploaded sheet. You can view customers, download sheet, or delete sheet as per your requirements.
This can be useful to upload attendee information from your past events, whom you can then target for your future events.
Manage Group — Grouping your customers allows you to organize your customers as per your business requirement. For example, you might want to group customers who have attended a particular event into groups.
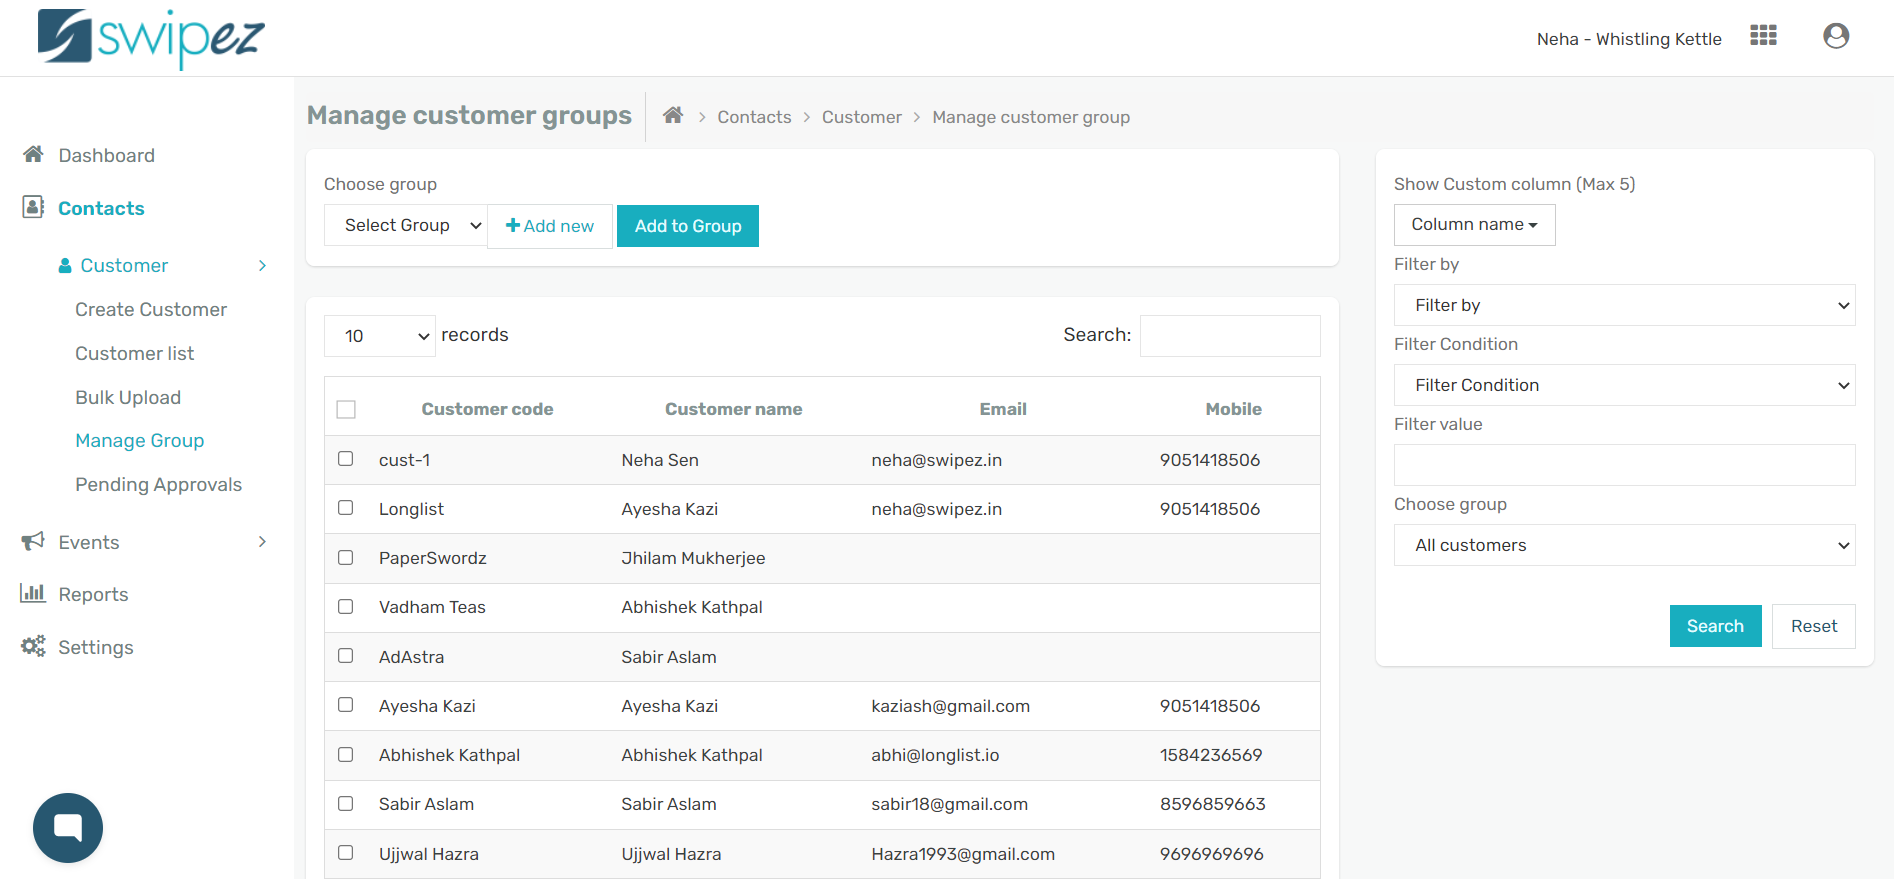
This will then allow you to reach out to your customers as per the event they have attended and understand their event preferences.
Pending Approvals — Automate your customer data curation. As your returning customers start paying for your event, they will correct or update their own personal information like mobile number, email id or address.
This updated information is captured and displayed in this tab for your approval. Upon your approval, this information is updated into your customer database.
Online event management options
To create your events or track the progress of event bookings navigate to the Events tab in the left-hand side menu.
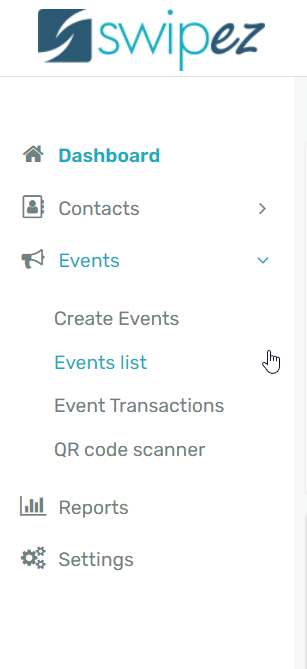
From the Events tab you can create your online event, check the status of all the events that have been created, and check their transaction status.
Create Events — Design and create events with the relevant event information and creatives effortlessly. And, start collecting event bookings and registrations for your event. To know more, read...
List Events — Listing of all your existing and previously created events. This section is used to manage and edit all your events. Read more.
Event Transactions — Listing of all online and offline transactions made for your events. The transactions can be filtered by date range, event name or status of the transaction. To know more, read...
Event reporting
To track your collections and bank account settlements from your event bookings navigate to the Reports tab in the left-hand side menu.
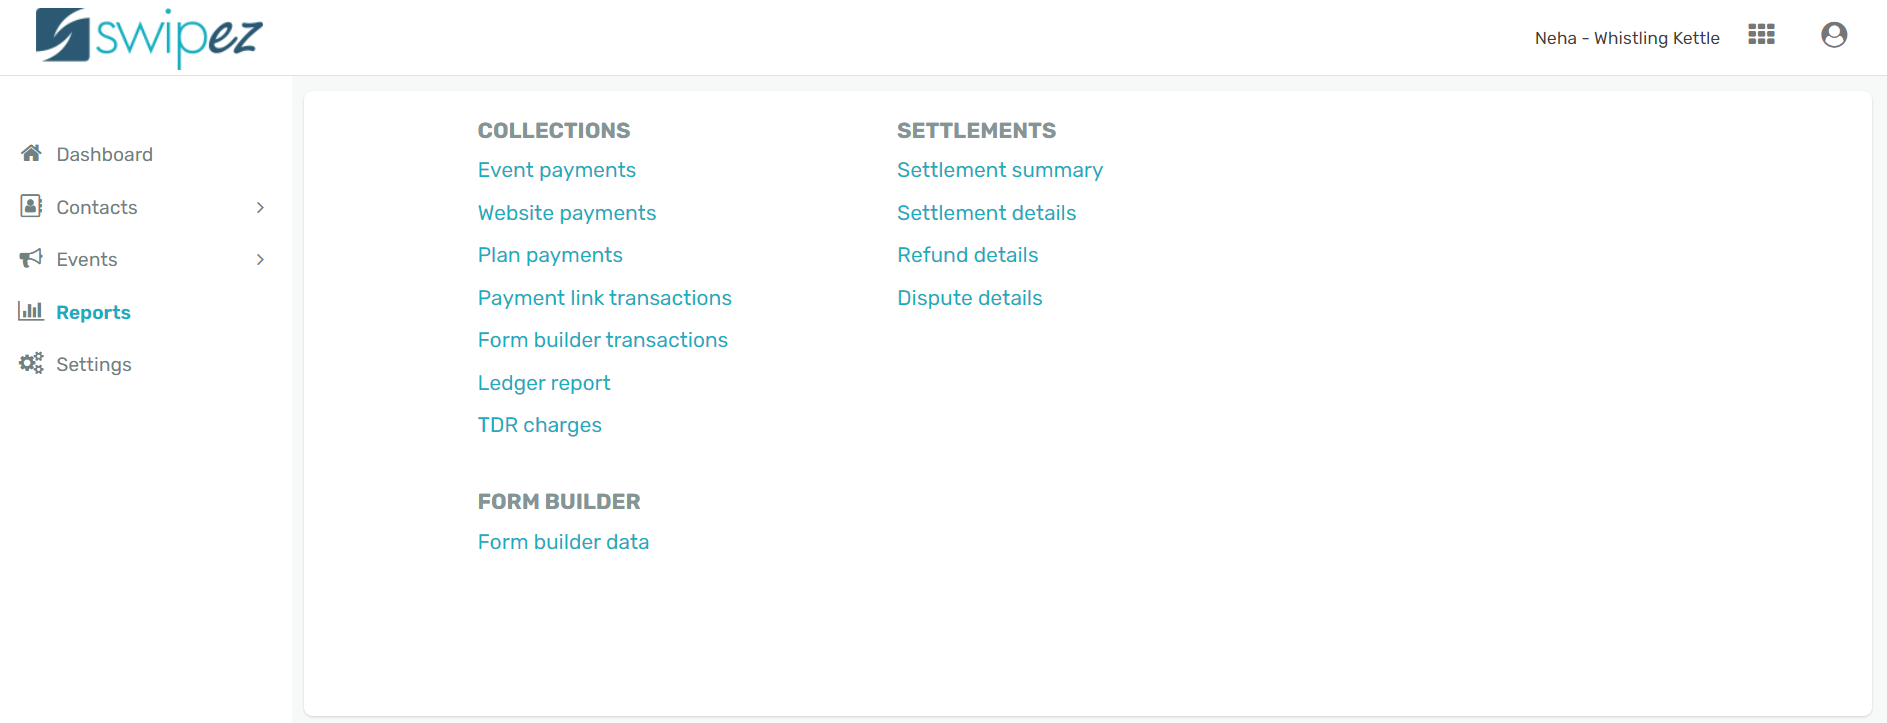
Navigate to the Collections tab under Reports to view all reports that pertain to collections of your business.
- Event Payments — Get a detailed report on payments received for events through Swipez. Review details like the method of payment, the amount paid, TDS, and more.
- Website Payments — Navigate to this tab to get reports on payments that have been received using Swipez partner payment gateways directly from your event website or third-party software.
- Plan Payments — If you have used Swipez's Plan functionality to list your available plans and to collect payments from your customer, details of those transactions can be found in this report.
- Payment Link Transactions — Get a comprehensive overview of all event payments made via Swipez's Direct Pay links.
- Form Builder Transactions — All your form builder transactions are available for you to review in this report.
- Ledger Reports — Navigate to the Ledger Reports section to get a synopsis of an attendee or payee's financial activity with your business.
- TDR Charges — Get a detailed view of all deductions made to your event payments including payment gateway transaction charges and GST.
These reports give you an accurate account of all payments received from your patrons for event booking. They can be downloaded conveniently via excel sheet for your accounting needs.
The Settlements tab under Reports helps you keep track of all payments made online and the deposits made by the payment gateway to your business's bank account for the event.
- Settlement Summary — Get a summarized view of deposits that have been made to your bank account by the payment gateway for all event payments received.
Settlements are usually made in batches which contain 2 days of transaction amounts. This report displays the total amount of the batch and date of the deposit.
- Settlement Details — Get a detailed breakdown of the transactions that have been settled to your bank account by the payment gateway.
- Refund Details — This report has details of all refund that have been initiated and processed through the Swipez event registration software.
- Dispute Details — This report has the details of all the disputes, initiated and settled, through the Swipez event registration software.
Navigate to the Reports tab and click on Form Builder to view all data and payments captured through Swipez.
- Form Builder Data — View all form and payment data obtained using Swipez Form Builder.