
A purchase order, or PO, is issued by a buyer committing to pay the seller for specific set of products or services to be delivered in the future. Purchase orders provide clarity to the seller of the expected products or services along with sale price and taxes that are applicable
Create purchase order
Navigate to Expense -> Create -> Purchase order to create your purchase order

Setup purchase order information
Enter information for the following fields to start creating your purchase order.
PO Number — Automatically creates an auto generating sequence of purchase order numbers. You can setup the starting the sequence the prefix as per your preference by clicking on the Gear ⚙ icon. If you want to enter the PO number manually each you can do that by selecting I will add them manually each time and click Save

Select Vendor — Vendors added to your account are show here. Learn how to add a vendor to your account. Select the vendor you want to create your purchase order for.
Category — Choose a category you want to place your purchase order into. Categories help to organize your purchase orders as per your preference. Learn how to categorize your purchase orders. You can also create a new category for your purchase by clicking the plus sign against the Category dropdown.

Department — Choose the department you are creating your purchase order for. Departments help you organize your purchase orders as per your company department. You can also create a new department for your purchase by clicking the plus sign against the Department dropdown.

Add delivery information
Reff number can be used to enter an reference number to make it easier for you or your vendor to identify the purchase order. Enter a PO date as the creation date of the purchase order and Expected delivery date for your purchase order.
Include items of purchase in your PO
Items of sale indicate the goods or service you are purchasing from your vendor. You can add multiple items of sale or particulars in one purchase order. Every particular at a minimum needs a description, unit and rate. The amount field Total in your particular items is summed up and which makes up the Grand Total along with taxes.
You can add new particulars by clicking the Add new row button
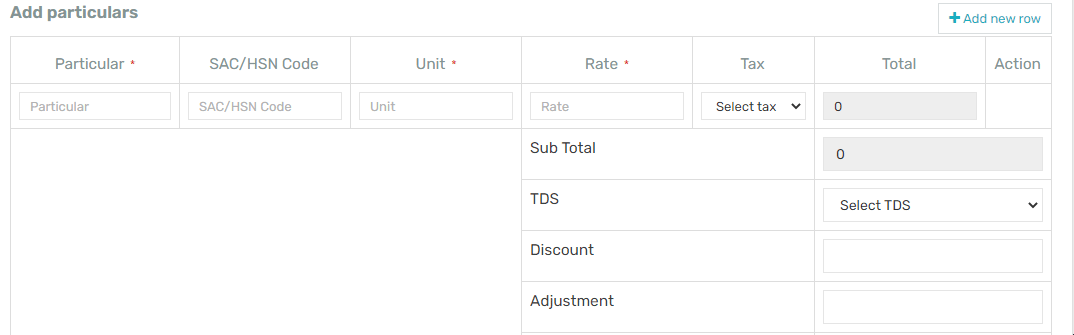
Add tax values to your PO
You can also add SAC/HSN Code and applicable Tax to each item. Selected Tax percentage and values are automatically split as CGST/SGST or labelle as IGST depending on the state your vendor belongs to. For ex. If your company is registered in Maharashtra and your vendors state is Gujarat then the Tax component will be labelled as IGST instead of CGST/SGST
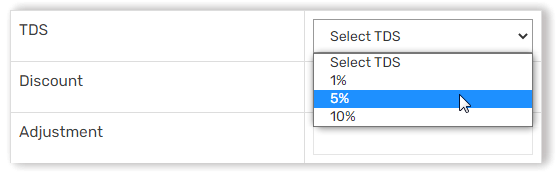
Along with setting up the applicable GST for your PO you can also add TDS deductions to your PO using the TDS dropdown
Add discount and adjustments to your PO
Discount — Enter an amount to discount the total amount, if applicable to your purchase order
Adjustment — Enter a + or - value to adjust the final purchase amount. This can be used to adjust any prior amounts that need to be adjusted with the vendor
Send your purchase order via email and SMS
Your purchase order is now ready. Using the Notify vendor button you could either Save this PO or Save & Send this PO. In the Save & Send option the PO will get sent to your vendor over email and SMS. The vendor receives your invoice on their email id and mobile number as saved in your vendor database.