
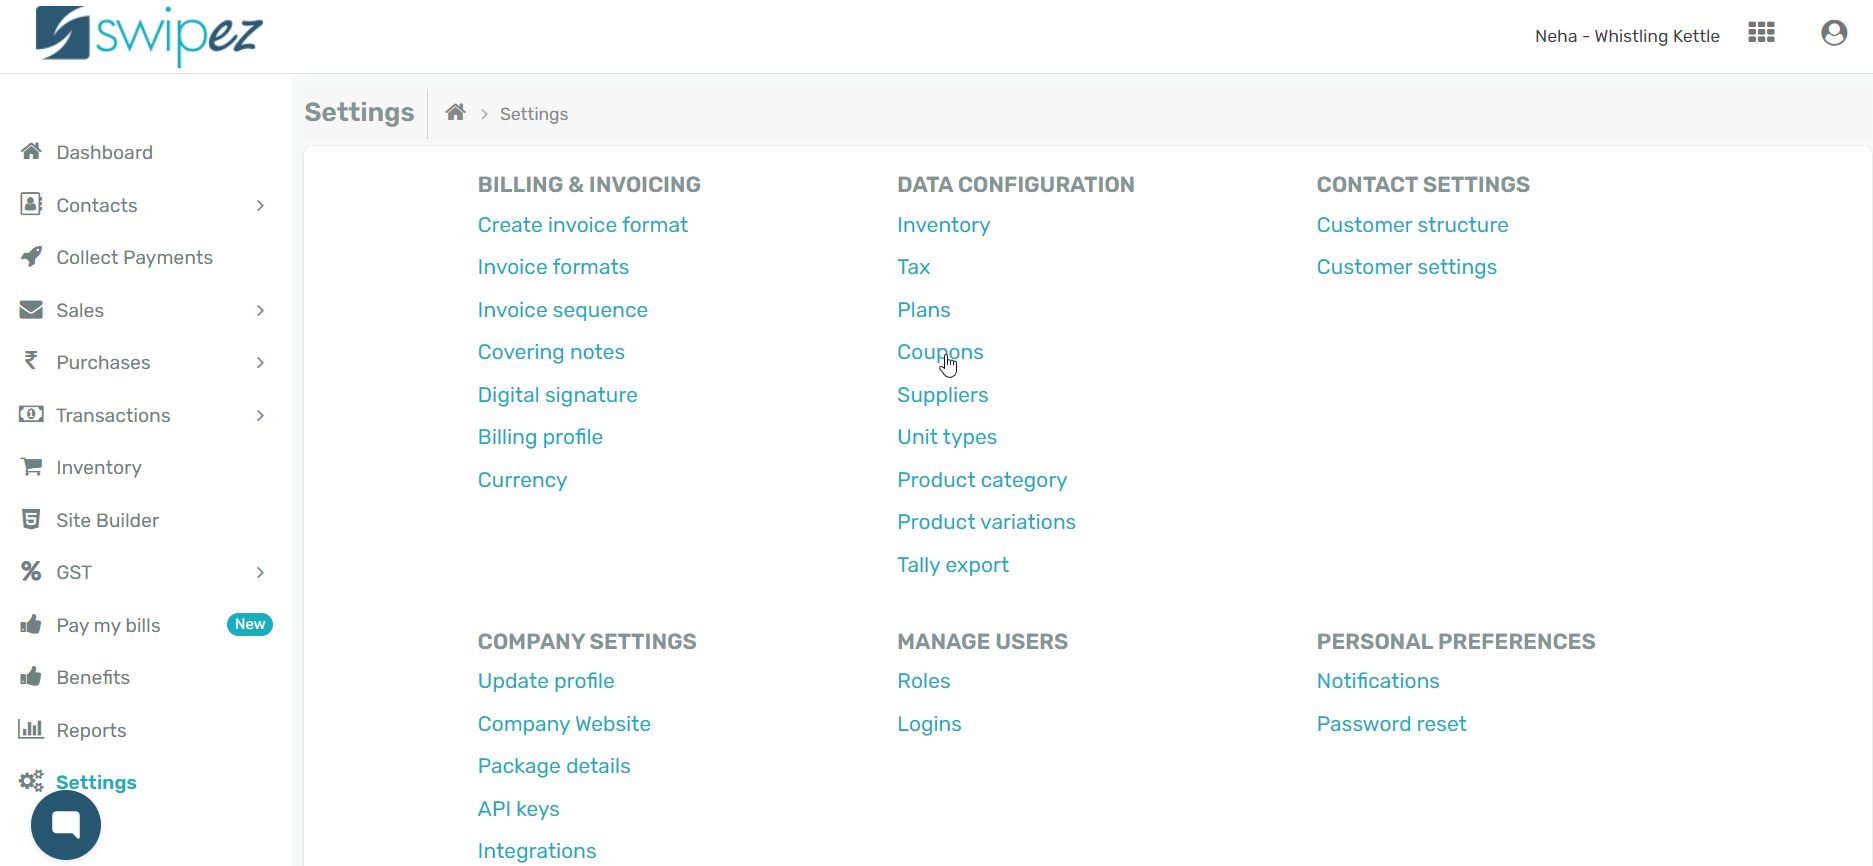
Navigate to the Settings section of your Swipez dashboard. Click on Coupons under the Data Configuration tab in the Settings section.
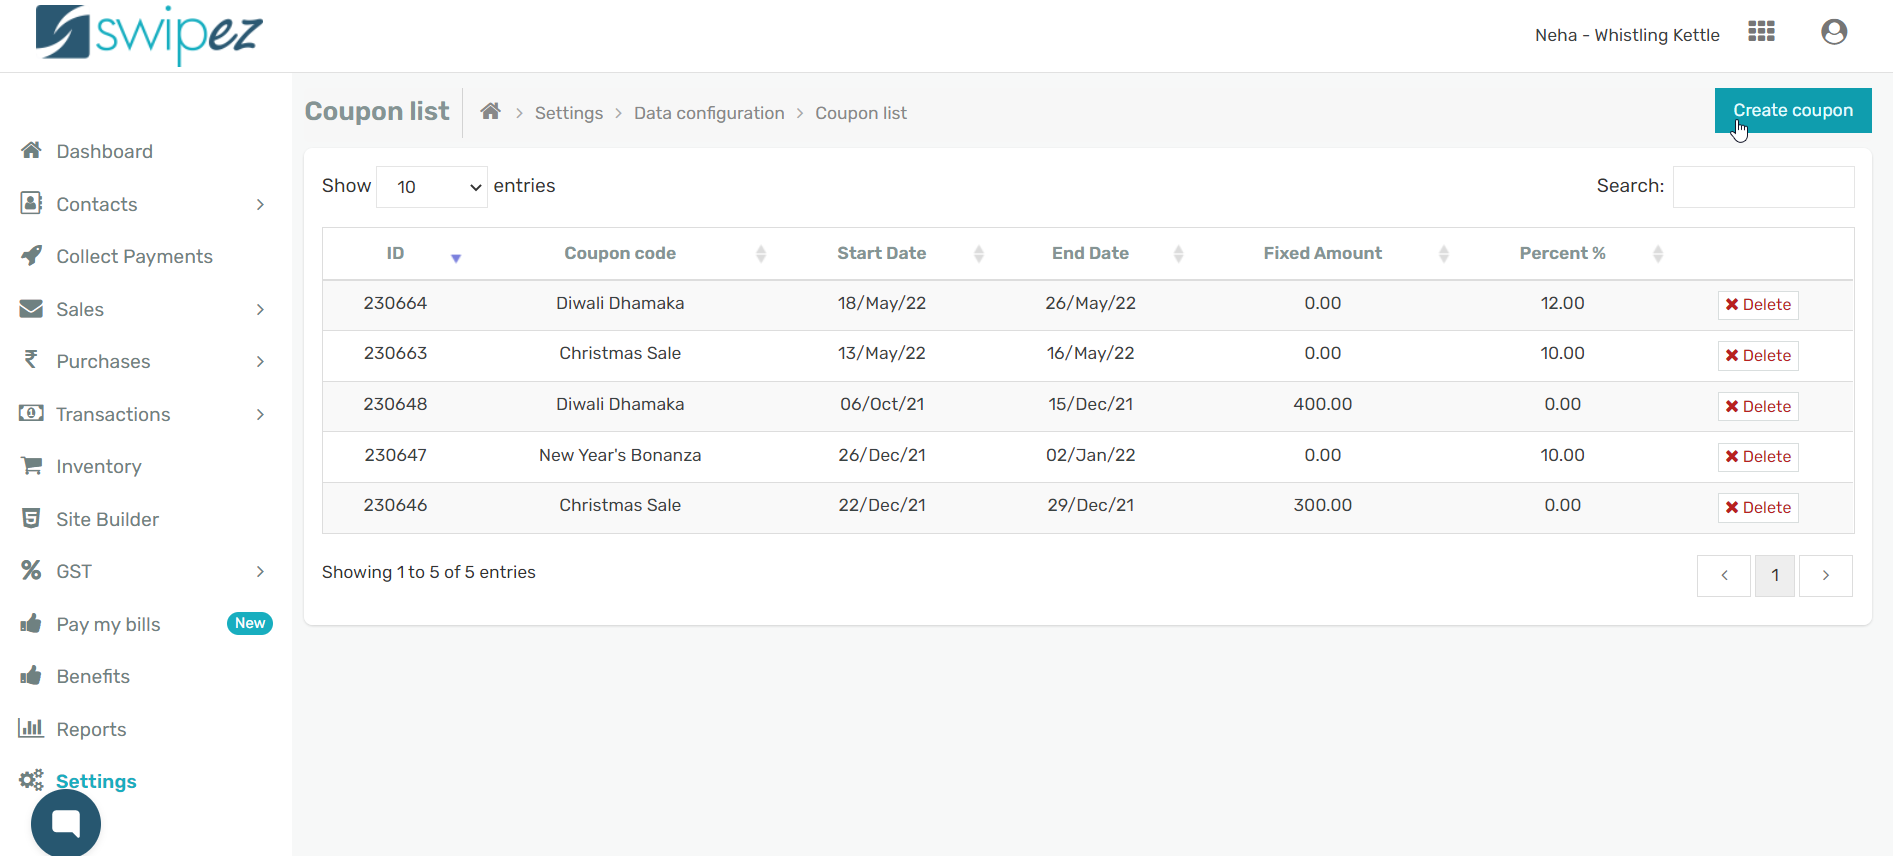
To create a new coupon click on the Create coupon button on the top right corner of the screen.
Create and customize your coupons by adding information like coupon Code, description, start date, end date, amount/percentage, and more.
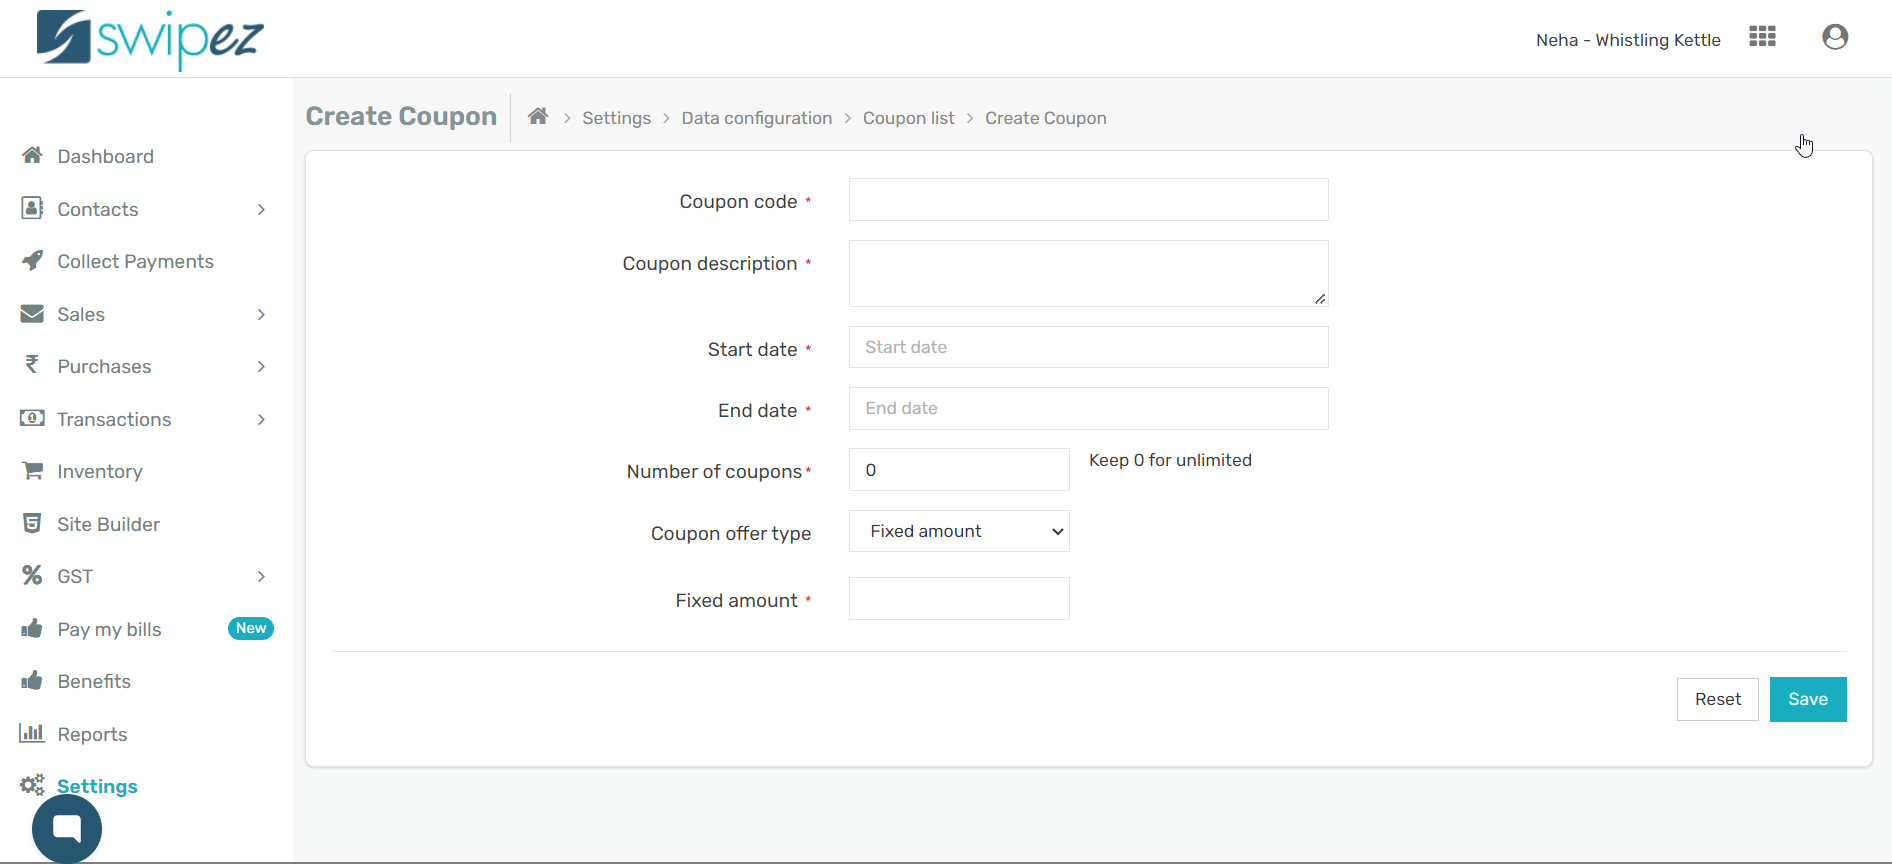
- Coupon Code: Customize the code you want to share with your customer. It is the code your customer will use to redeem the discount you are offering.
- Coupon Description: Add details related to the coupon. For example, 'Get a 25% discount on all summer courses'.
- Start Date/ End Date: Set the validity period for the coupon. Your customers will be able to use the coupon and avail the discounts for the time period set between the start and end dates.
- Number Of Coupons: Choose the number of coupons that are to be created. (To provide unlimited coupons let the number remain as 0)
- Coupon Offer Type: Customize the kind of discount you want to offer with your coupon.
You can choose to create a coupon with a fixed amount and add the amount of money that will be discounted/deducted from the invoice number.

You can also create a coupon with percentage offer type where the coupon will discount a percentage of the invoice amount. For example, if you have created a coupon for 10% and the invoice amount is ₹ 1000, the coupon is valid for a discount of ₹100.

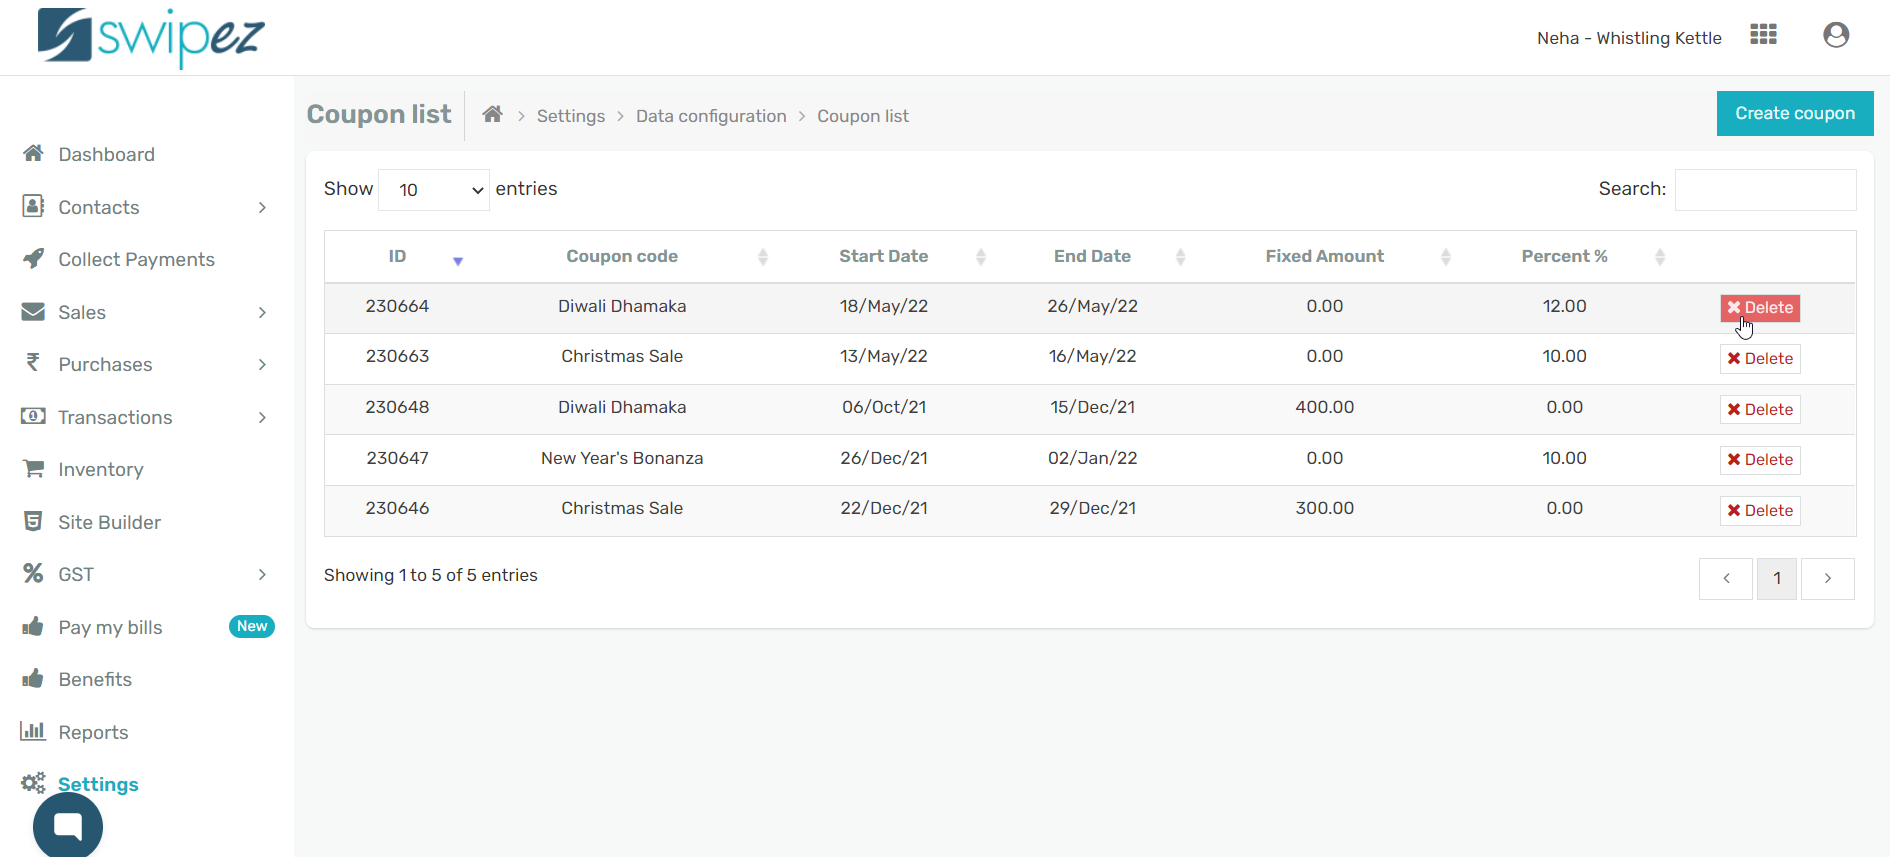
You can review the coupons you have created and their details in the Coupon list. You can delete the ones that you want to discard and create new coupons as per your requirements.
To know more about adding coupons to invoice, click here.
Related apps
- Billing software - Free billing software, bulk invoicing, online payments, automated payment reminders, and more.