
Customer groups help to organize your customer data. Customer groups can be used to send communications to a select section of your customer base.
- To create customer groups from your customer data navigate to Contacts -> Customer -> Manage Group
- In the Manage Group page in the Choose group section click the Add new button
- In the input box Group name provide a name to your customer group. For ex. New customers
- In the Customer list section the complete list of your customers is visible. There are 2 methods to add customers into a group:
- Select the customers you want to add from your full listing of customers. In this case you will have individually select each customer from the full listing
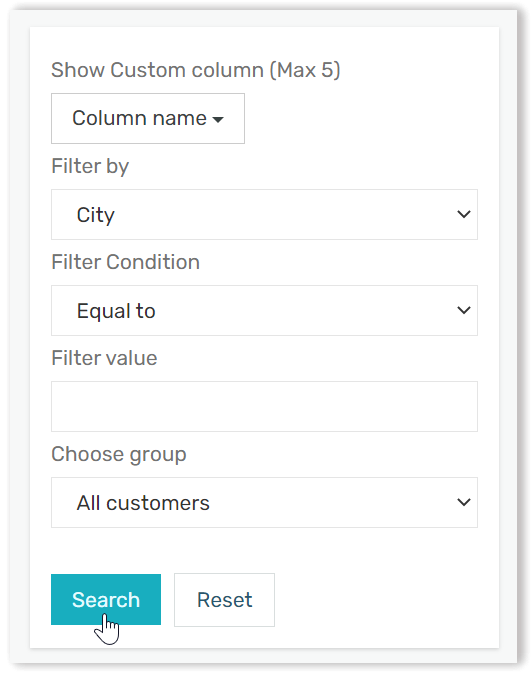
- The second option is to use the Search criteria option on the right hand side and selecting a group of customers for ex. you can search for customers with city as Pune. By selecting the Filter by search criteria as City, Filter Condition as Equal to and Filter value set as Pune and hit Search. Your customer listing changes to reflect the search filter. You can select all these customers and add them into your group.
- The second option is to use the Search criteria option on the right hand side and selecting a group of customers for ex. you can search for customers with city as Pune. By selecting the Filter by search criteria as City, Filter Condition as Equal to and Filter value set as Pune and hit Search. Your customer listing changes to reflect the search filter. You can select all these customers and add them into your group.
- Select the customers you want to add from your full listing of customers. In this case you will have individually select each customer from the full listing
- Once your customers are selected click on the Add to Group button to create your group of customers

With this, you can start grouping your customers as per your business requirements.
Advanced usage: You can also create groups from existing groups by using the Choose group facility to filter your groups further.