
Import invoice data in bulk with a few quick and simple steps. Save time and eliminate any errors that may be introduced due to manual input.
Bulk upload invoice data using excel sheet
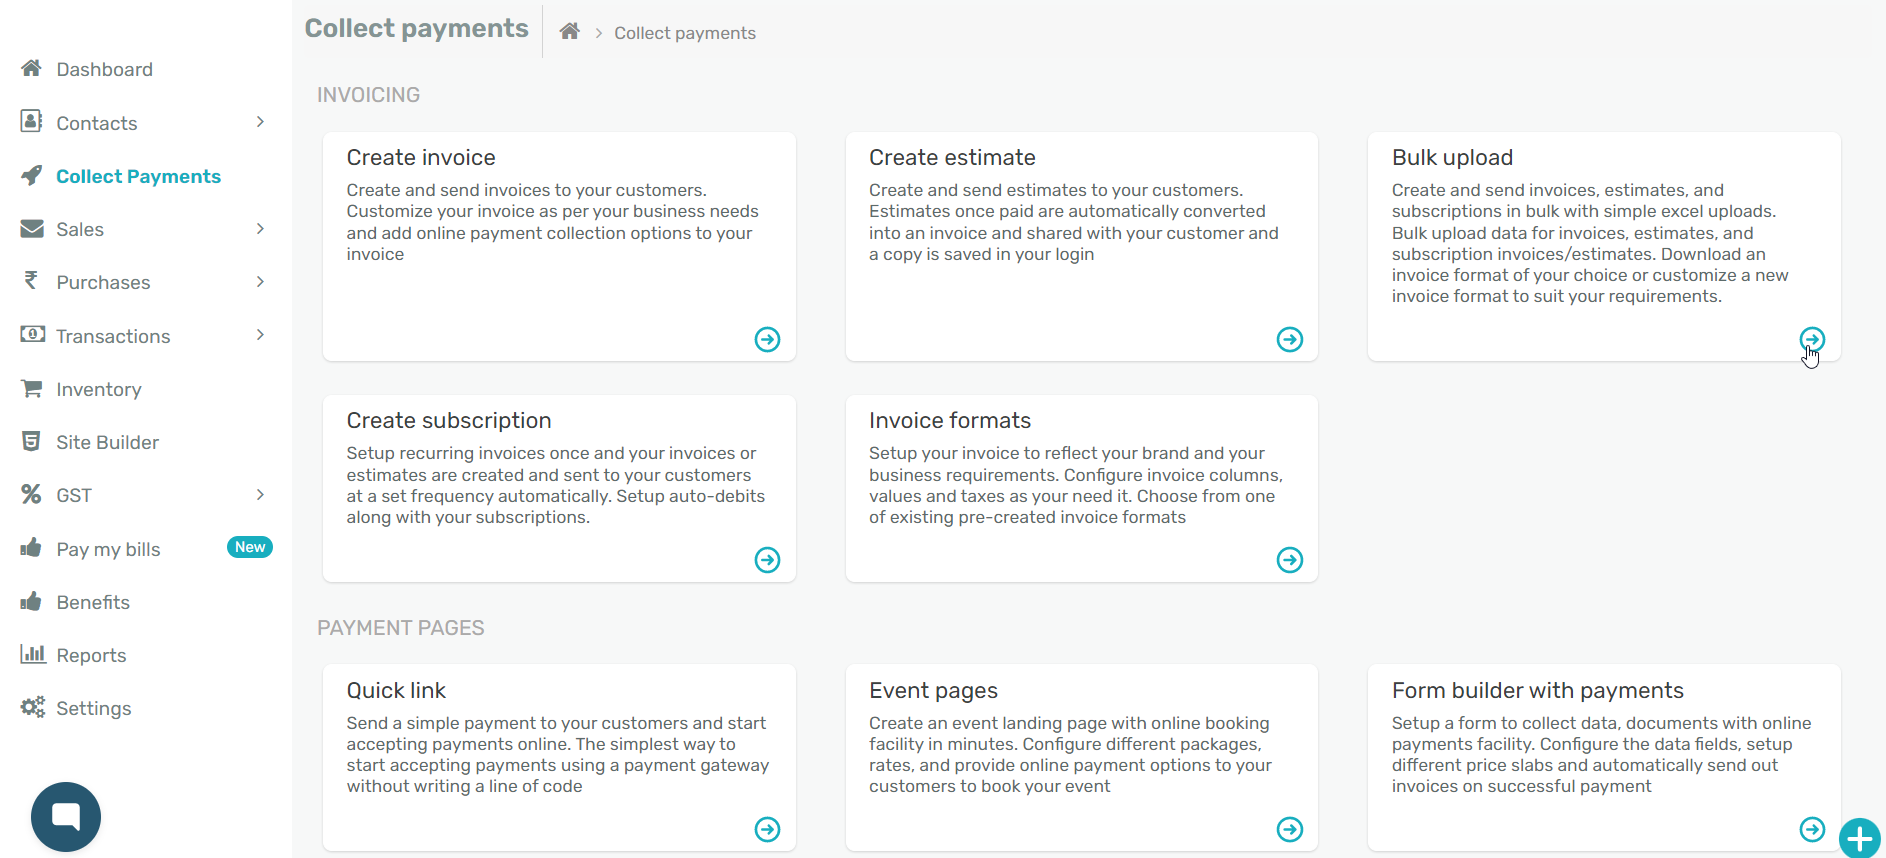
Navigate to Collect Payments tab on your dashboard and click on the Bulk Upload option.
Choose the invoice format for which you want to upload invoice details for, from the drop-down list. Select type of invoice format and the columns of information you want to capture from the sheet type drop-down list. Click on the Download button to download an excel sheet of the invoice format of your specifications.
You can also choose the Add new format option from the Invoice format drop-down list to create a new format to download. To know more about creating a new invoice format, read...
The downloaded excel sheet will contain the different columns for the different fields in your format to capture invoice details as per your needs.
If you have added custom fields to your invoice format, those columns will be present in the downloaded excel sheet as well.
Add your invoice data into the columns of the downloaded excel sheet and save your changes.

Select file to choose the sheet with the filled data that you want to upload, and click Upload. Once uploaded, the status of the sheet will be represented as Processing.

It takes about 2-3 minutes for your uploaded sheet to be processed and its status to change to Review.
Review uploaded data
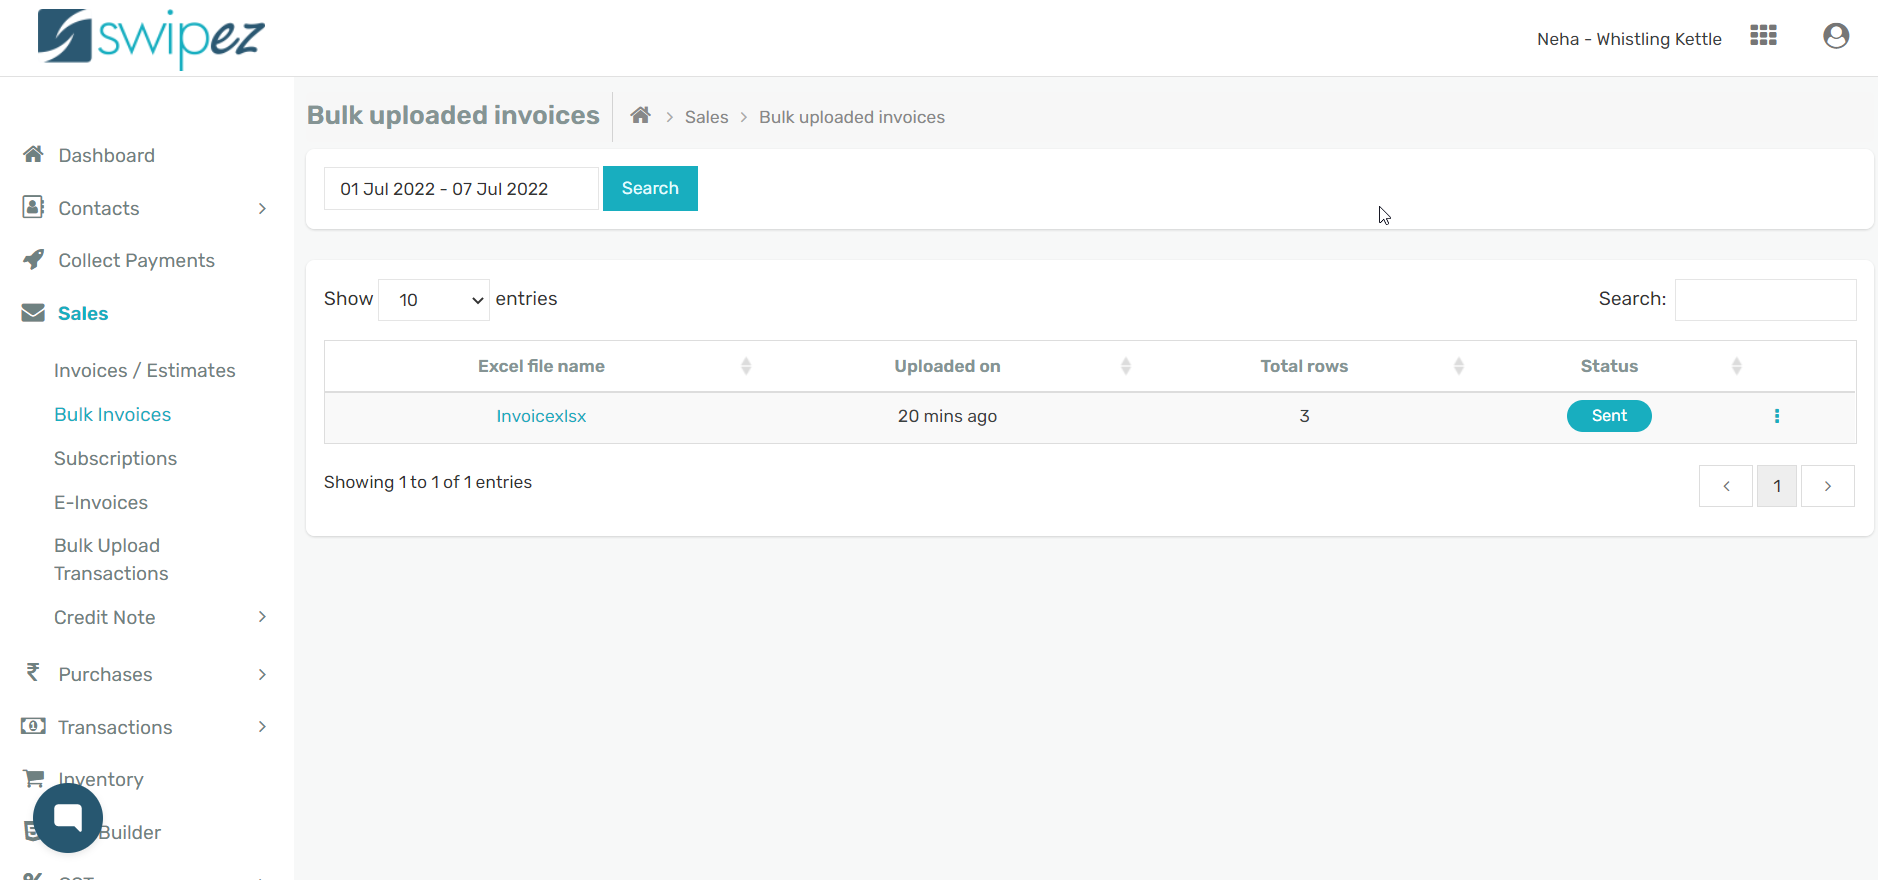
To review the uploaded sheet and its status, navigate to Sales -> Bulk Invoices tab.
The uploaded sheet is visible under the Bulk uploaded invoices sheet with its status as Review.

Click on the Actions ⋮ button if you want to make changes to the uploaded sheet. You can Download sheet, View requests, Re-upload sheet with any necessary changes, Delete sheet, or Send requests.
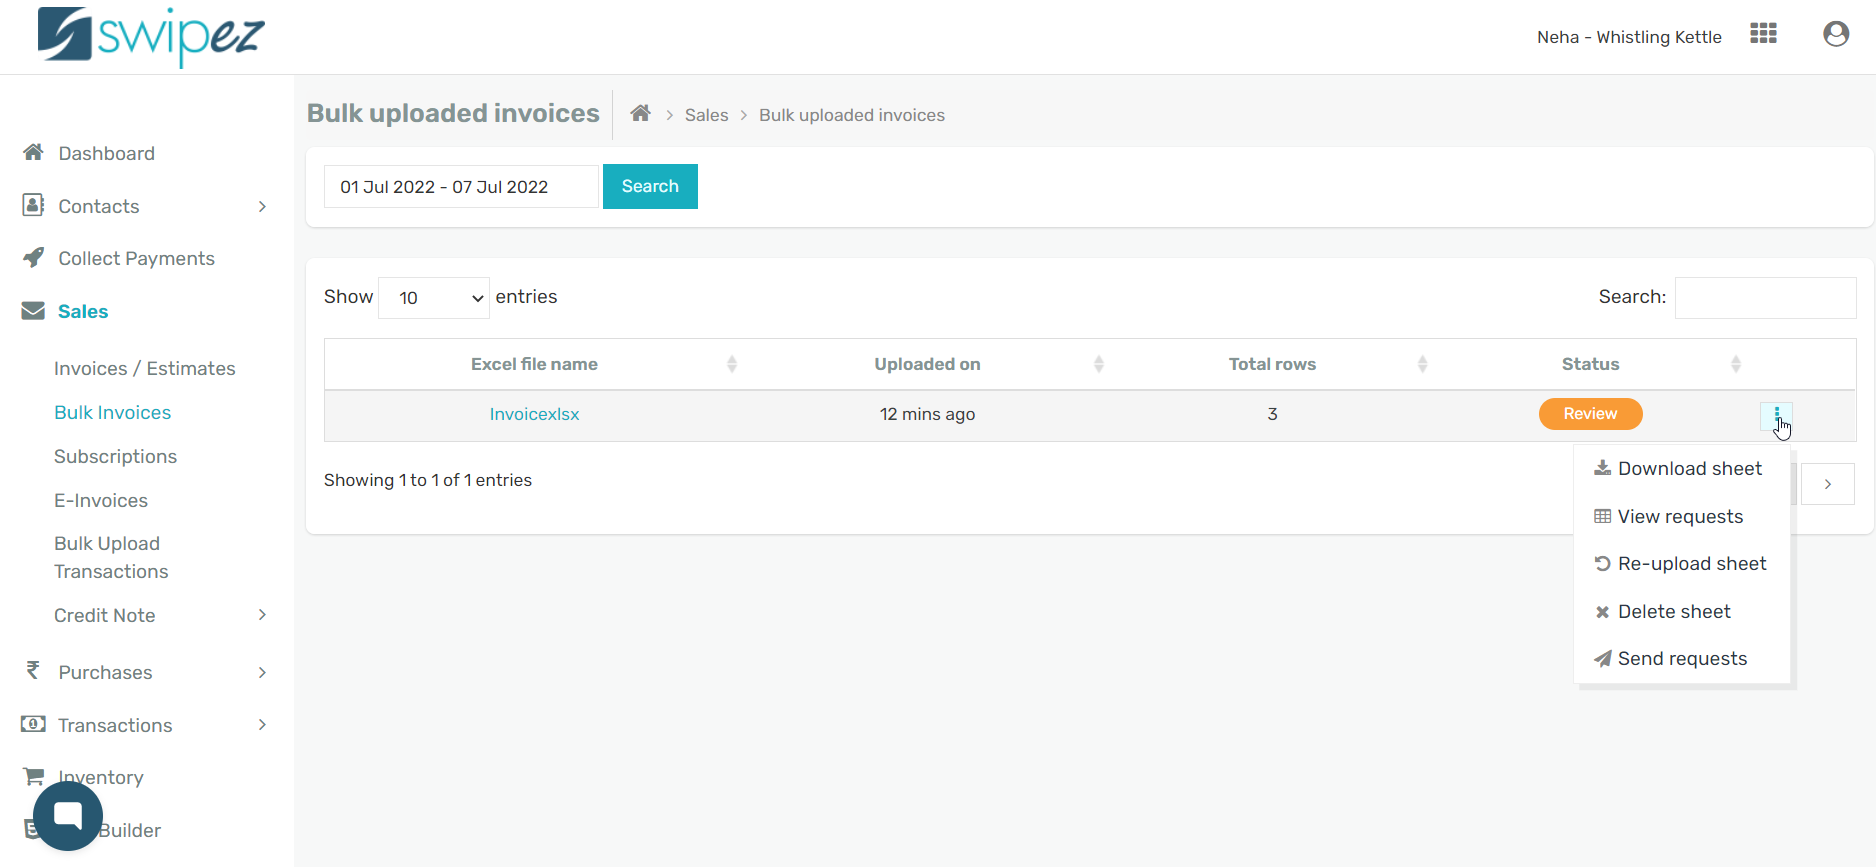
Download sheet lets you download a copy of the sheet, while View requests lets you review the uploaded data.
If you notice any errors you can download the sheet, make corrections, and Re-upload sheet before you send the invoices to your customers.
You can also Delete sheet if you want to delete the uploaded data.
Once you are certain about the accuracy of the uploaded data and are ready to send the invoices to your customers, click on Send requests. In the pop-up Send Excel Invoices window, click on Confirm to send the invoices.
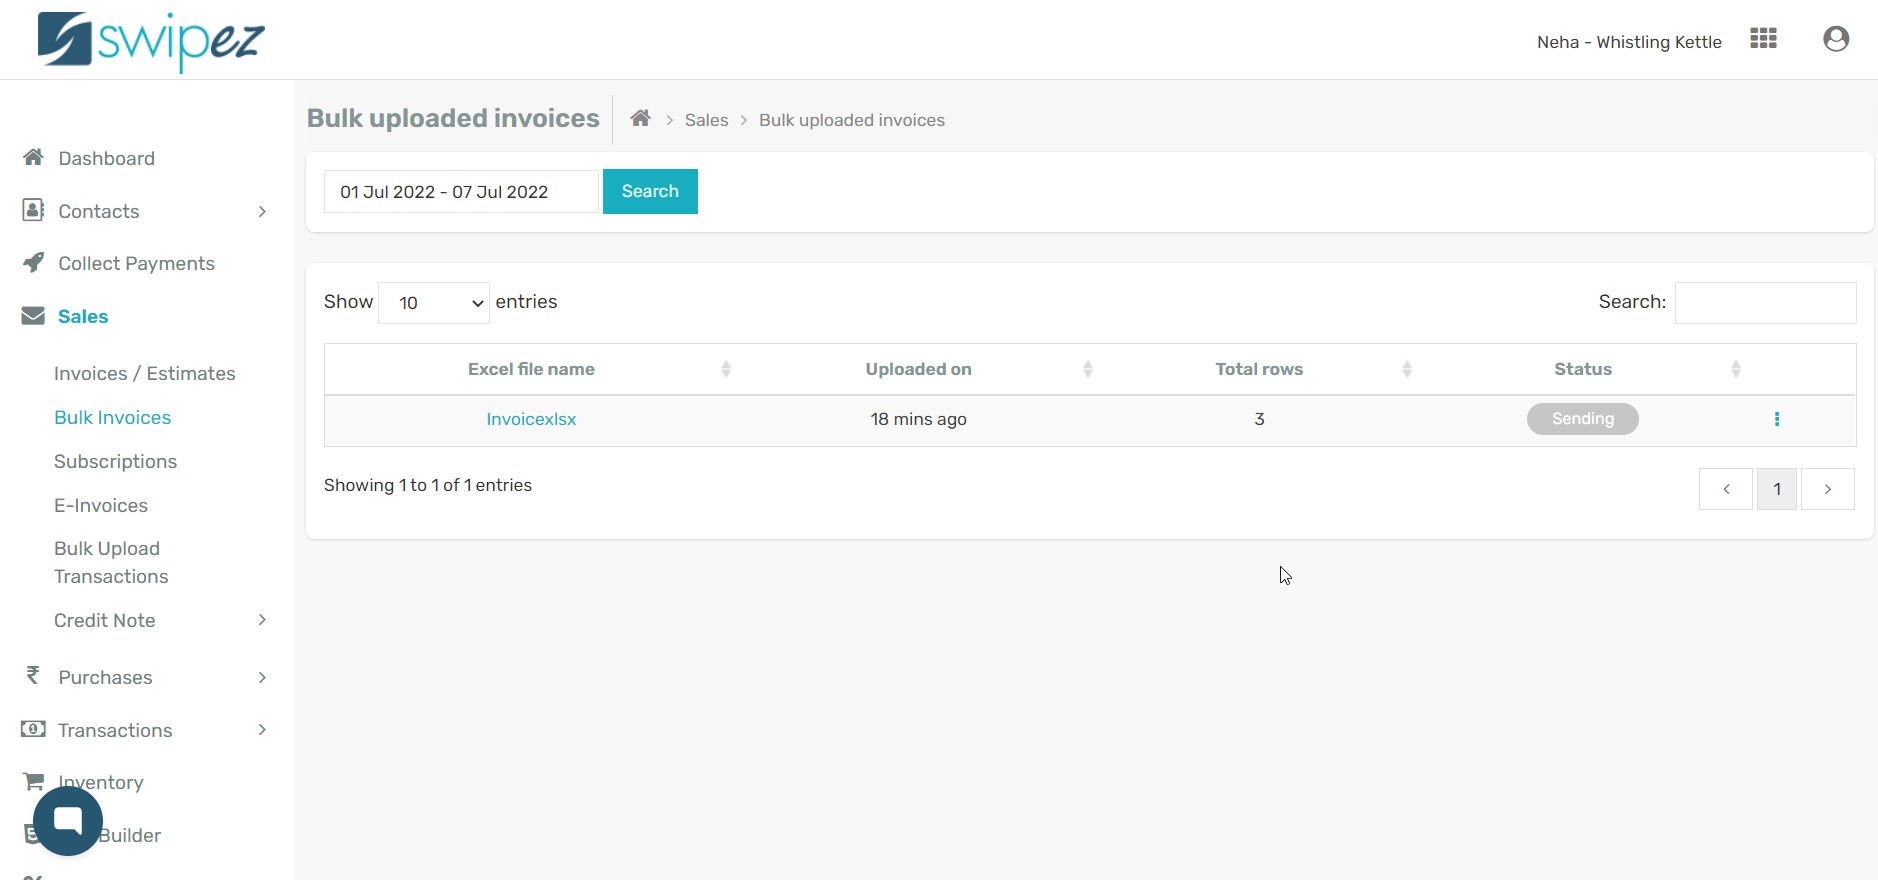
Swipez will take 2-3 minutes to create and send the invoices to your customers, who will be notified via email & SMS as per your preferences. The status for the uploaded sheet will be automatically updated as Sent.
Related apps
- Billing software - Bulk invoicing, free billing software, online payments and payment reminders