
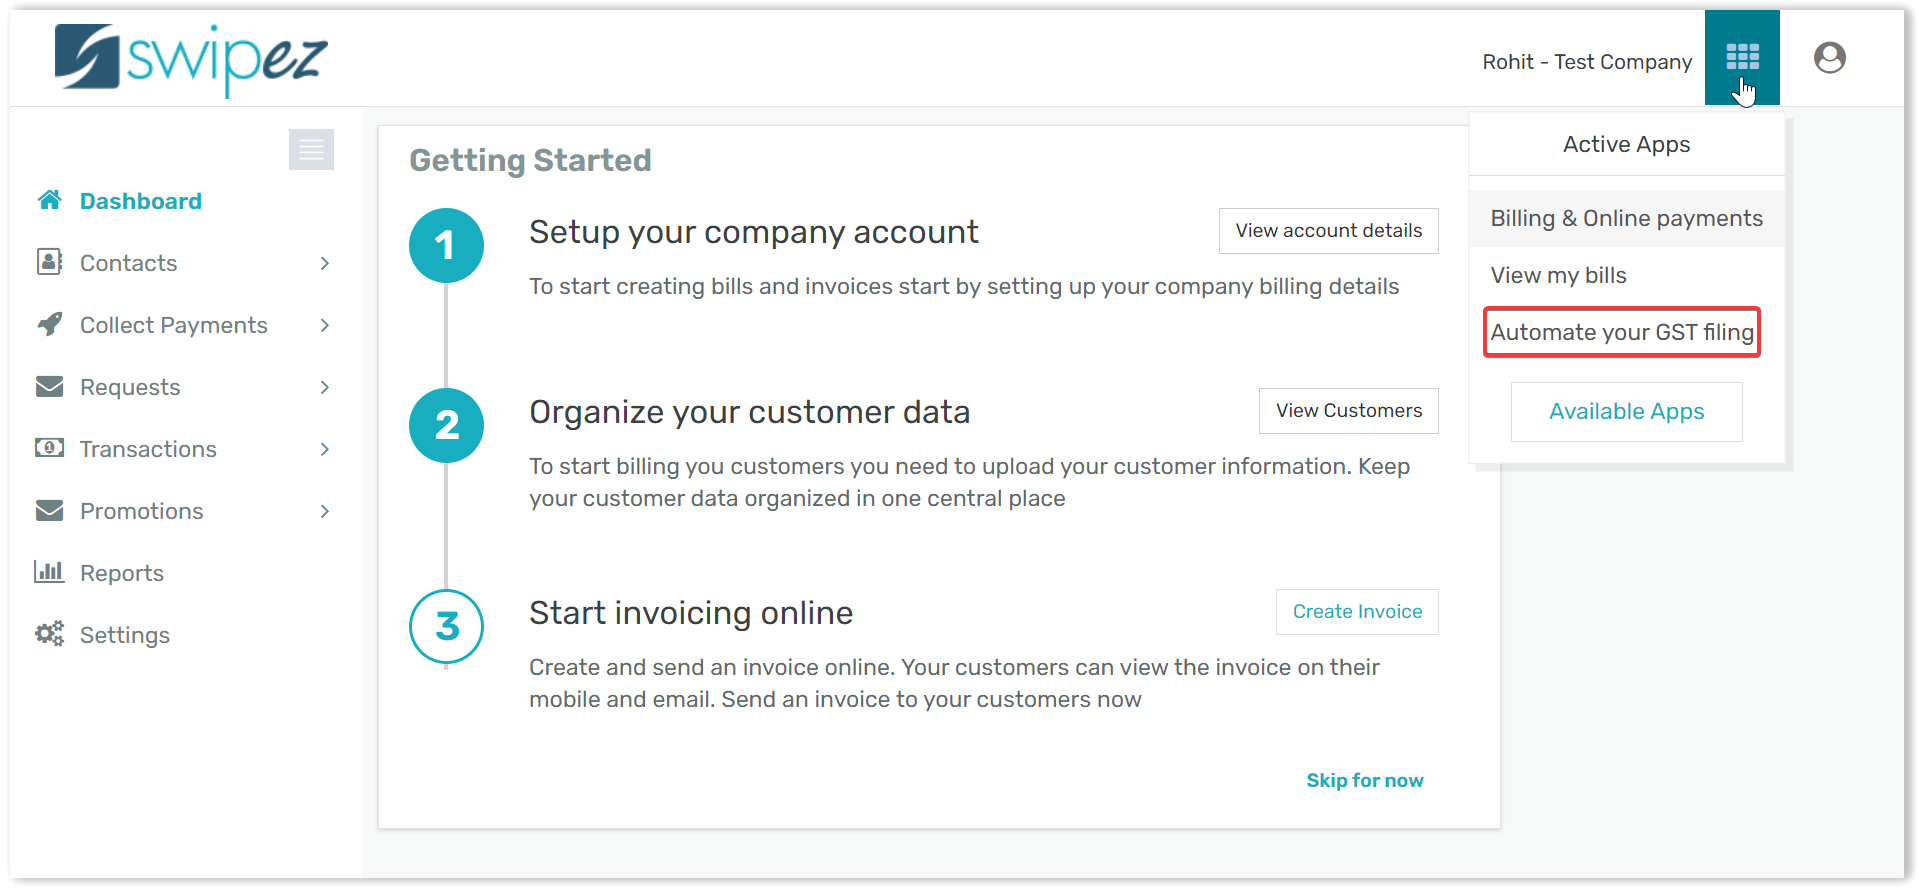
Navigate to the Apps section on the top right corner of the dashboard & select the Automate you GST filing option. Learn how to activate the GST filing option in your Swipez account
Click on the GST option within the dashboard & select the Invoices button, before moving forward kindly ensure that your GST number is linked with your Swipez account and you have made a secure GST connection via OTP. Learn how to connect your GST portal login with your Swipez account.
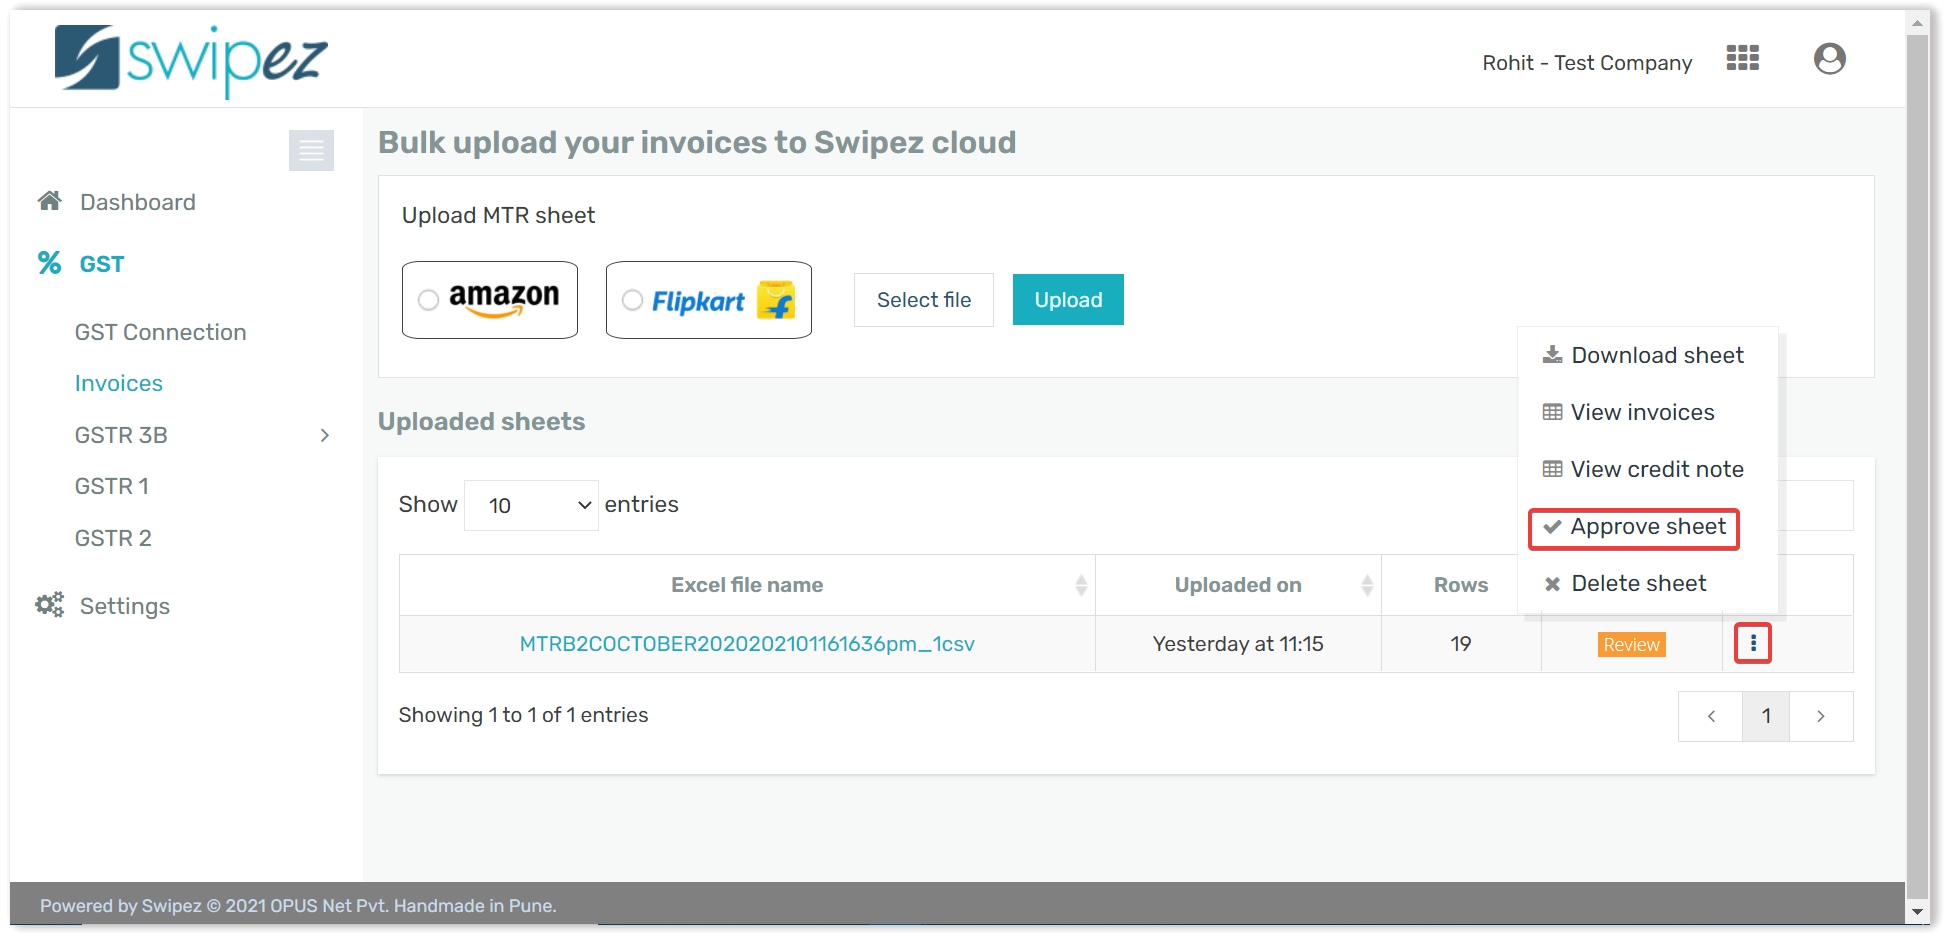
Firstly you need to Upload invoices from the dropdown.

Now you have the option to either select the MTR file provided by either Amazon or Flipkart if you are an E-commerce seller, If not then you can move the invoices from the Swipez platform and file those invoices as well.

Post this the sheet uploaded will be visible in review status, using the ⋮ button you can view all the invoices and delete any if needed, similarly you can view the credit notes for reviewing purposes. After you are done reviewing, click on Approve sheet.
A popup should appear, click on the Confirm button and confirm the approval of the invoices.

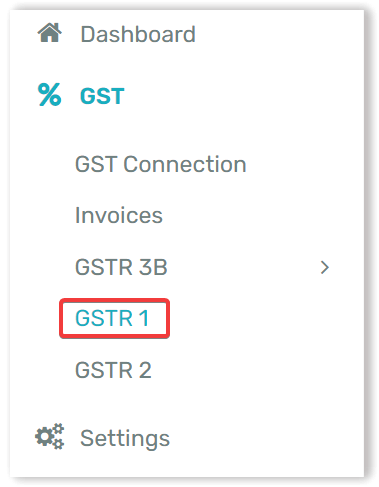
Now your invoices have been added successfully, for the next step click on the GSTR 1 option within the dashboard.
Enter all relevant details by selecting the GSTIN, choosing the bill date from & bill date to section you can mention the file period month, file period year and what kind of invoices you are uploading. (B2B, B2C or Credit Notes.)
Click on the Prepare for review button.

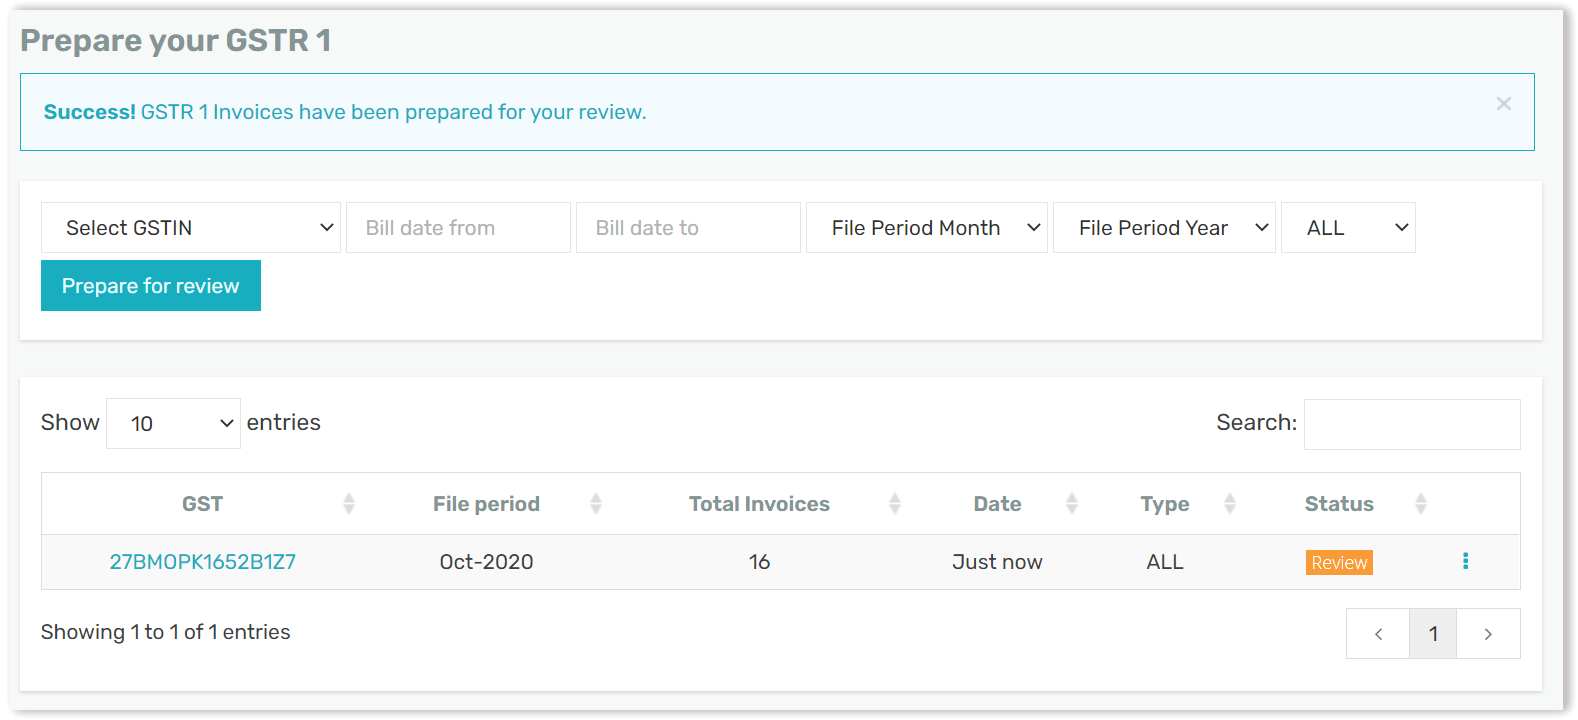
Post this, your invoices for the GSTR 1 can either go into a Review status or a Failed status.
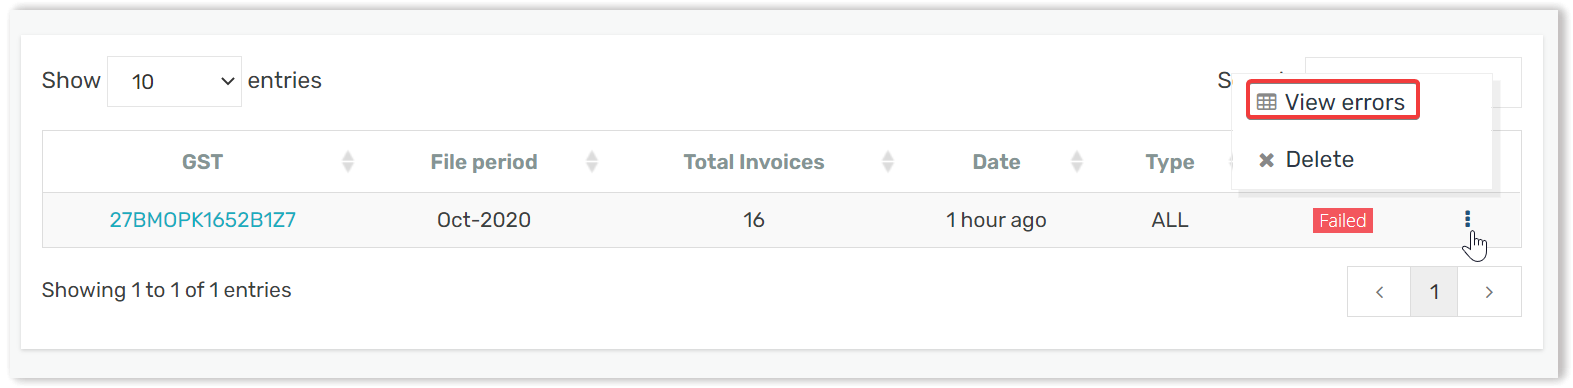
If you have made any errors while filing it will update the status as Failed, As shown below you can select the ⋮ button and view errors made for rectification.
If the invoices are in a review status, you can review the same & using the ⋮ option you can perform the following actions:
- View the invoices prepared for filing
- Prepare documents
- Approve the prepared data
- Delete the prepared data
Click on Approve data if data is accurate & ready to be filed.
Post this all your data for GSTR1 will be uploaded to your GST portal. Next step is for you to create a challan and make a payment if applicable.