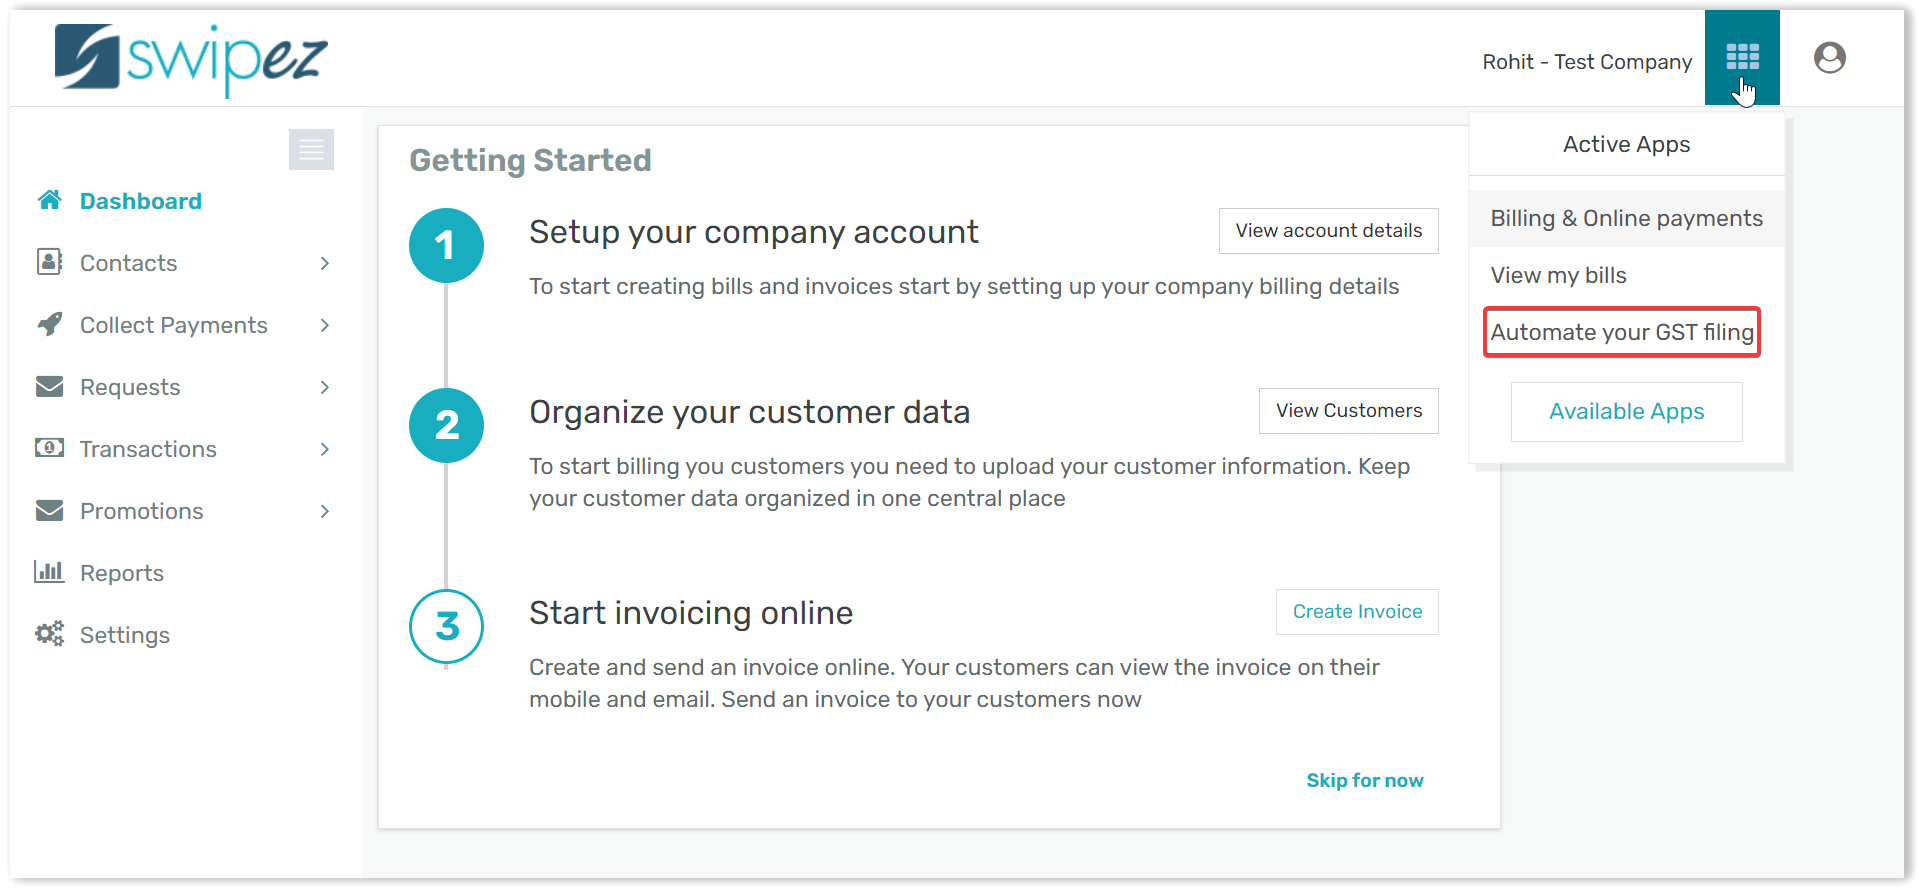
Navigate to the Apps section on the top right corner of the dashboard & select the Automate you GST filing option. Learn how to activate the GST filing option in your Swipez account
Click on the GST option within the dashboard & select the Invoices button, before moving forward kindly ensure that your GST number is linked with your Swipez account and you have made a secure GST connection via OTP. Learn how to connect your GST portal login with your Swipez account.
1. Upload invoices — Upload a file with all your invoice details mentioned or use the MTR report provided from E-commerce platforms such as Amazon & Flipkart.
2. Upload stock transfer — Invoices related to stock transfer are to be uploaded here.
3. Move Swipez invoices — If you are using the Swipez billing software, you can simply move invoices from within your Swipez account and create your GST R1 return.
4. Move Swipez Credit/Debit notes — If you are using the Swipez Expense management software, you can simply just move Credit/Debit notes from your Swipez account and create your GST R1 with ease.
Now Simply select the GSTIN, Month, Year & click on Search. You should be able to view all invoices which you have prepared to file & can Delete any invoices which aren't valid.
You're all set! Now you can simply file for your GSTR-1 & GSTR-3B with ease.

Article suggestions